VideoEdge 201 - Installation
Introduction
To get started with VideoEdge, you'll need to install the software on a dedicated server or virtual machine and configure it using the Setup Wizard. Once the initial configuration is complete, you can access the VideoEdge Administration Interface to manage cameras, users, storage, and other settings. In this lesson summary, we'll go over the steps for installing and setting up VideoEdge, with sections that cover Installation, the Setup Wizard, and the VideoEdge Administration Interface. By following these steps, you can set up VideoEdge to manage and store your video surveillance footage effectively.
Table of Contents
Overview
I. Installation
VideoEdge can be installed on a dedicated server or virtual machine.
The installation process involves downloading the installer, running it on the server or virtual machine, and following the prompts.
Once the installation is complete, the VideoEdge Setup Wizard will guide you through the initial configuration.
II. The Setup Wizard
The Setup Wizard will prompt you to configure network settings, create a password for the administrator account, and set up storage.
You can choose to use internal storage, external storage, or a combination of both.
The Setup Wizard will also guide you through configuring camera settings and setting up recording schedules.
Key Points
To use VideoEdge, you need to install the software on a dedicated server or virtual machine, and configure it using the Setup Wizard.
The Setup Wizard guides you through configuring basic settings such as network settings, camera settings, and recording schedules.
After completing the Setup Wizard, you can access the VideoEdge Administration Interface to manage cameras, users, storage, and other settings.
VideoEdge can be installed as a hardware and software bundle or a software-only bundle.
The installation process involves downloading the installer, running it on the server or virtual machine, and following the prompts.
The Setup Wizard includes several menu items: Preparation, System, Network, System Security - Security Settings, System Security - User Accounts, System Security - Media Encryption, and Devices.
Standard Security Mode requires changing default passwords and has universal plug and play (UPnP) enabled by default. Enhanced Security Mode requires creating new user accounts and passwords, has UPnP disabled by default, and enforces HTTPS-only mode.
The Discovery page shows all discoverable devices on your network that you can add to VideoEdge. You can discover multiple devices until you reach your camera license limit.
Once you complete the setup wizard, VideoEdge will be ready to use, and you can access it through the VideoEdge Administrator icon on your desktop or via a remote client.
Installation Types
VideoEdge is supplied as either a hardware and software bundle or a software only bundle. A hardware and software bundle comes with VideoEdge preinstalled on a VideoEdge NVR. The software only bundle comes with just the installation media to be installed on an NVR.
Hardware and Software Bundles
This section details the installation and configuration process for Hardware and Software Bundles. When VideoEdge is supplied as a hardware and software bundle, the following are preconfigured:
Basic system settings, including time and region.
Default partitioning, including the required system partitions and some media partitions.
Note: If the preconfigured media partitions are not suitable, they can be edited after installation.
VideoEdge is supplied with NIC eth0 enabled. VideoEdge is set to resolve a DHCP IP address, and will be assigned a default static IP address of 10.10.10.10 if DHCP is not available. All other NICs are supplied disabled. The network settings are configured using the setup wizard.
There are three stages to setting up and installing VideoEdge hardware and software bundles:
Booting up VideoEdge for the first time.
Logging into the VideoEdge desktop.
Configuring VideoEdge using the setup wizard.
Booting up VideoEdge for the first time
Turn on the VideoEdge NVR.
A series of boot messages appear and the system is loaded to the License Agreement.
Click Next.
When the license agreement is displayed, select Yes, I Agree to the License Agreement.
Logging in to the VideoEdge Desktop
When the system boots to the VideoEdge login screen, log in to the VideoEdge desktop to continue the installation and configuration process.
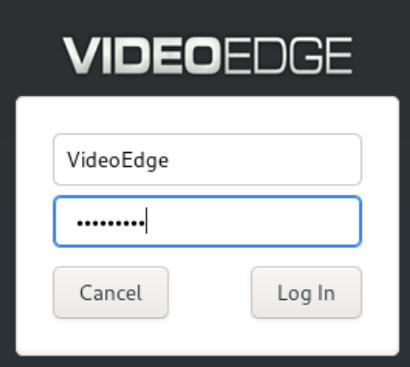
Enter the Username. The default username is VideoEdge.
Enter the Password. The default password is VideoEdge.
Click Log In.
Setup Wizard
Once VideoEdge is installed, you must configure the basic settings using the setup wizard. You are automatically directed to the setup wizard the first time you log in to the Administration Interface after installation.
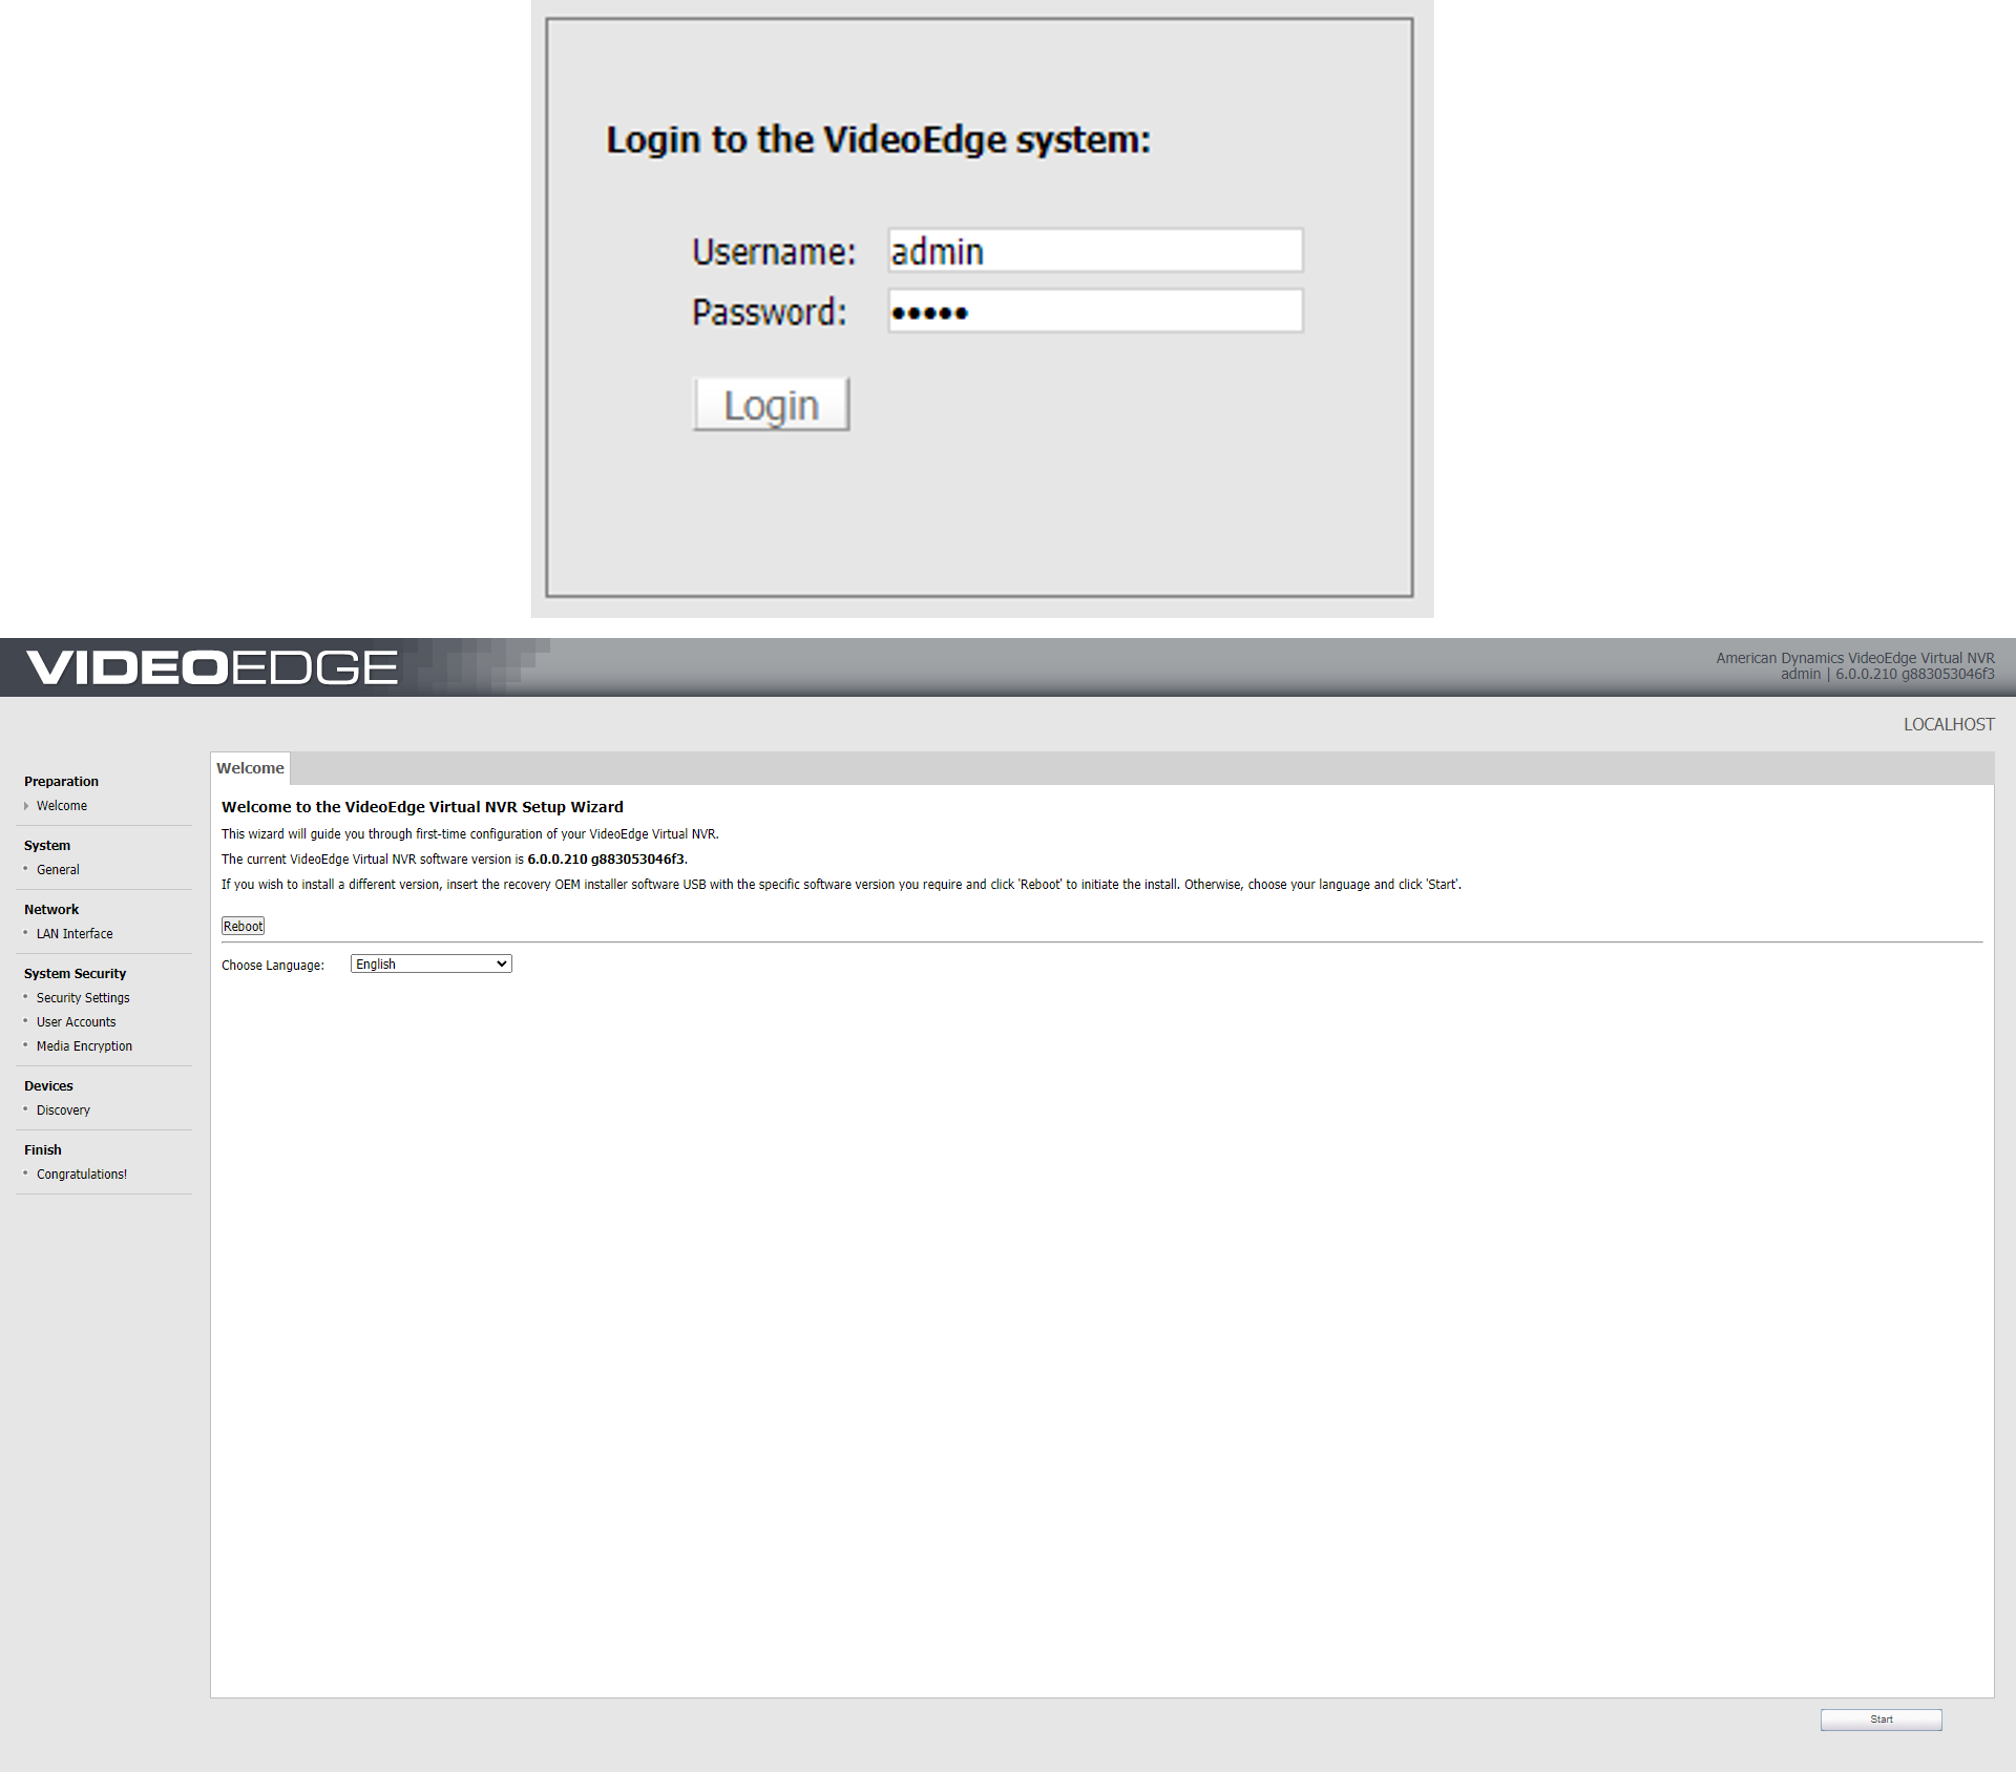
Enter the Administrator Username. The default username is admin.
Enter the Administrator Password. The default password is admin.
Click Login.
The VideoEdge Setup Wizard begins.
Complete the Setup Wizard.
Software-only Bundles
This section details the installation and configuration process for Software-only bundles. When VideoEdge is supplied as a software-only bundle, you must install it onto your hardware. Before installing the VideoEdge software, ensure that:
The hardware meets the minimum operation requirements.
The system drive is connected to the SATA 0 location on the motherboard.
There are four stages to setting up and installing VideoEdge software-only bundles:
Booting the system using the NVR software disk or USB drive.
Rebooting the system after basic installation.
Logging in to the VideoEdge desktop.
Configuring VideoEdge using the Setup Wizard.
Before installation, you must ensure that the system drive is connected to the SATA 0 location on the motherboard. This is the default connection, when the NVR was originally shipped.
Any previously configured OS on this system will be removed and overwritten
Booting the system using the NVR software disk or USB drive.
Insert the VideoEdge software DVD into the optical drive, or insert the VideoEdge Installation USB drive into one of the available USB ports and restart your computer/server.
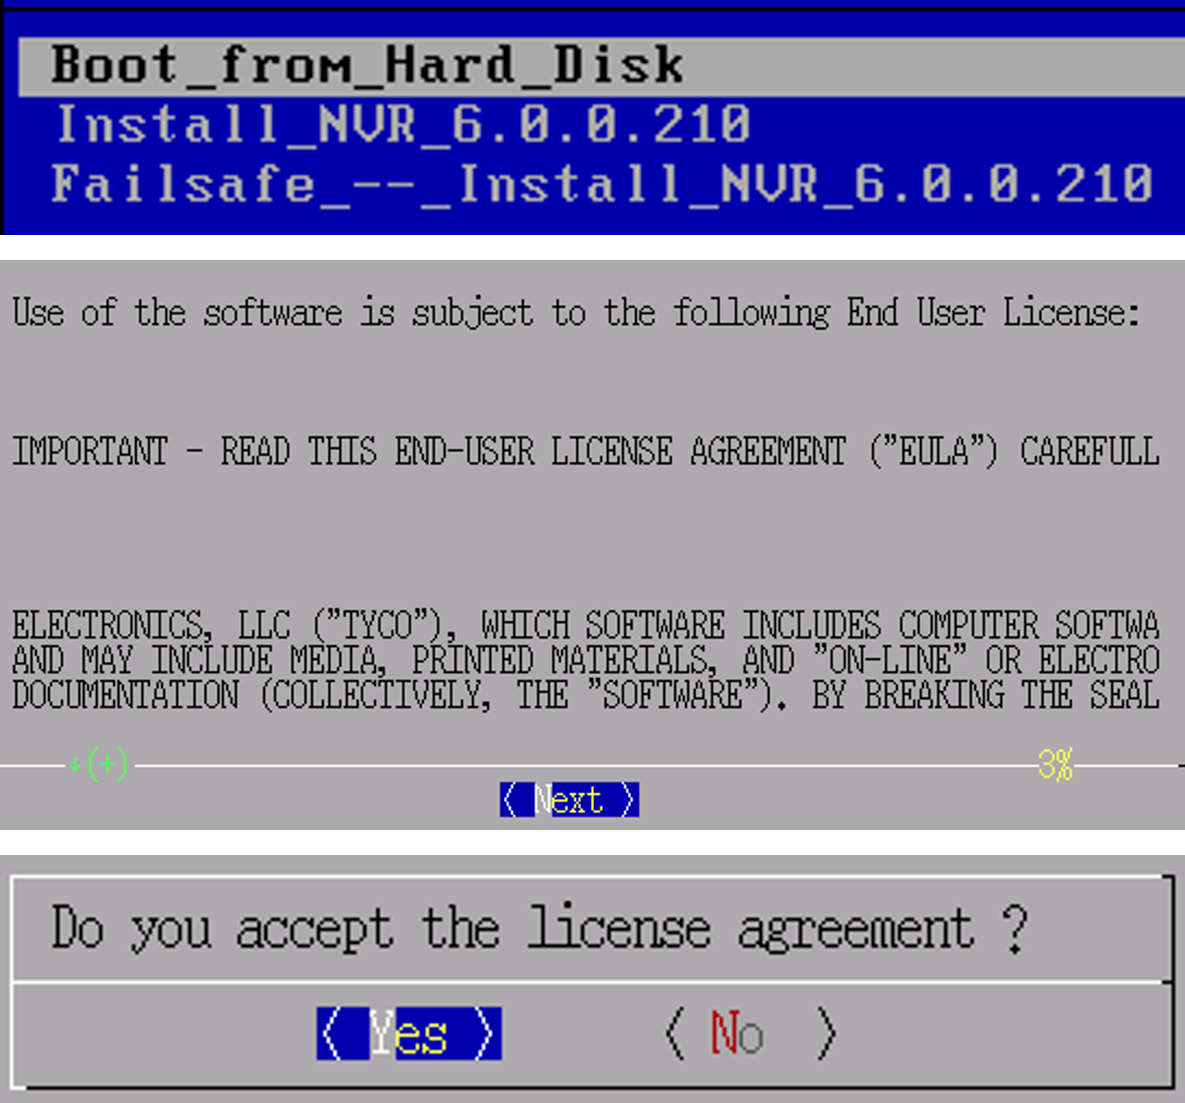
VideoEdge boots from the DVD or USB drive and the installation options menu opens. Note: If VideoEdge does not boot from the disk, intercept the boot loader by pressing the required function key, F2, F8 etc. Select the required drive and press Enter.
From the installations option menu select Install / Restore_VideoEdge_NVR_Release_x.x.x.xxx, where x.x.x.xxx is the software version you are installing, and press Enter.
After approximately 20 seconds the installation will automatically start in this mode. A Loading Linux Kernel pop-up displays, followed by a series of boot messages. This process may take several minutes.
The VideoEdge software will install the minimum required Linux Operating System to run the VideoEdge system (The VideoEdge software is installed as an appliance).
Rebooting the system after basic installation
When the license agreement is displayed, select Yes, I Agree to the License Agreement. The self-installer initiates; progress will be displayed during installation.
Once the self-installer has completed, click Reboot NVR when prompted
Remove the software DVD or USB drive used for the installation.
When the GRUB screen displays, ensure VideoEdge is selected and press Enter.
Logging into the VideoEdge Desktop
When the system boots to the VideoEdge login screen, log in to the VideoEdge desktop to continue the installation and configuration process.
Enter the Username. The default username is VideoEdge.
Enter the Password. The default password is VideoEdge.
Click Log In.
Setup Wizard
Once VideoEdge is installed, you must configure the basic settings using the setup wizard. You are automatically directed to the setup wizard the first time you log in to the Administration Interface after installation.
Enter the Administrator Username. The default username is admin.
Enter the Administrator Password. The default password is admin.
Click Login.
Complete the Setup Wizard.
After 10 minutes of inactivity, the VideoEdge desktop automatically locks and displays a screen saver. This locking method increases security by restricting desktop access. To release the screen lock, click on the window or press any key to display an unlock prompt screen. The screen lock can activate during the initial install process. When the VideoEdge OS installation window locks, on the unlock prompt screen, use root as the password.
If VideoEdge Client is open when the screen locks after 10 minutes of inactivity, the screensaver will not be shown – VideoEdge Client will continue to be shown onscreen. Once the user moves their mouse, the unlock prompt screen will be shown.
Setup Wizard
After successfully installing VideoEdge software, you'll need to log in to the VideoEdge Administration Interface and use the Setup Wizard to configure basic settings. The wizard will launch automatically when you access the interface for the first time after installation.
If you leave the wizard before completing all the steps, your progress will be saved, and you can pick up where you left off when you return to it.
Once you complete the wizard, VideoEdge will be ready to use, and you can access it through the VideoEdge Administrator icon on your desktop or via a remote client.
The wizard includes the following menu items:
Preparation
System
Netwok
System Security - Security Settings
System Security - User Accounts
System Security - Media Encryption
Devices
Preperation
The Welcome page is the first page of the setup wizard.
From the Welcome page you can:
Select the language in which the Administration Interface needs to be displayed.
You can view the current version of the VideoEdge software, or you can install a different version of the VideoEdge software.
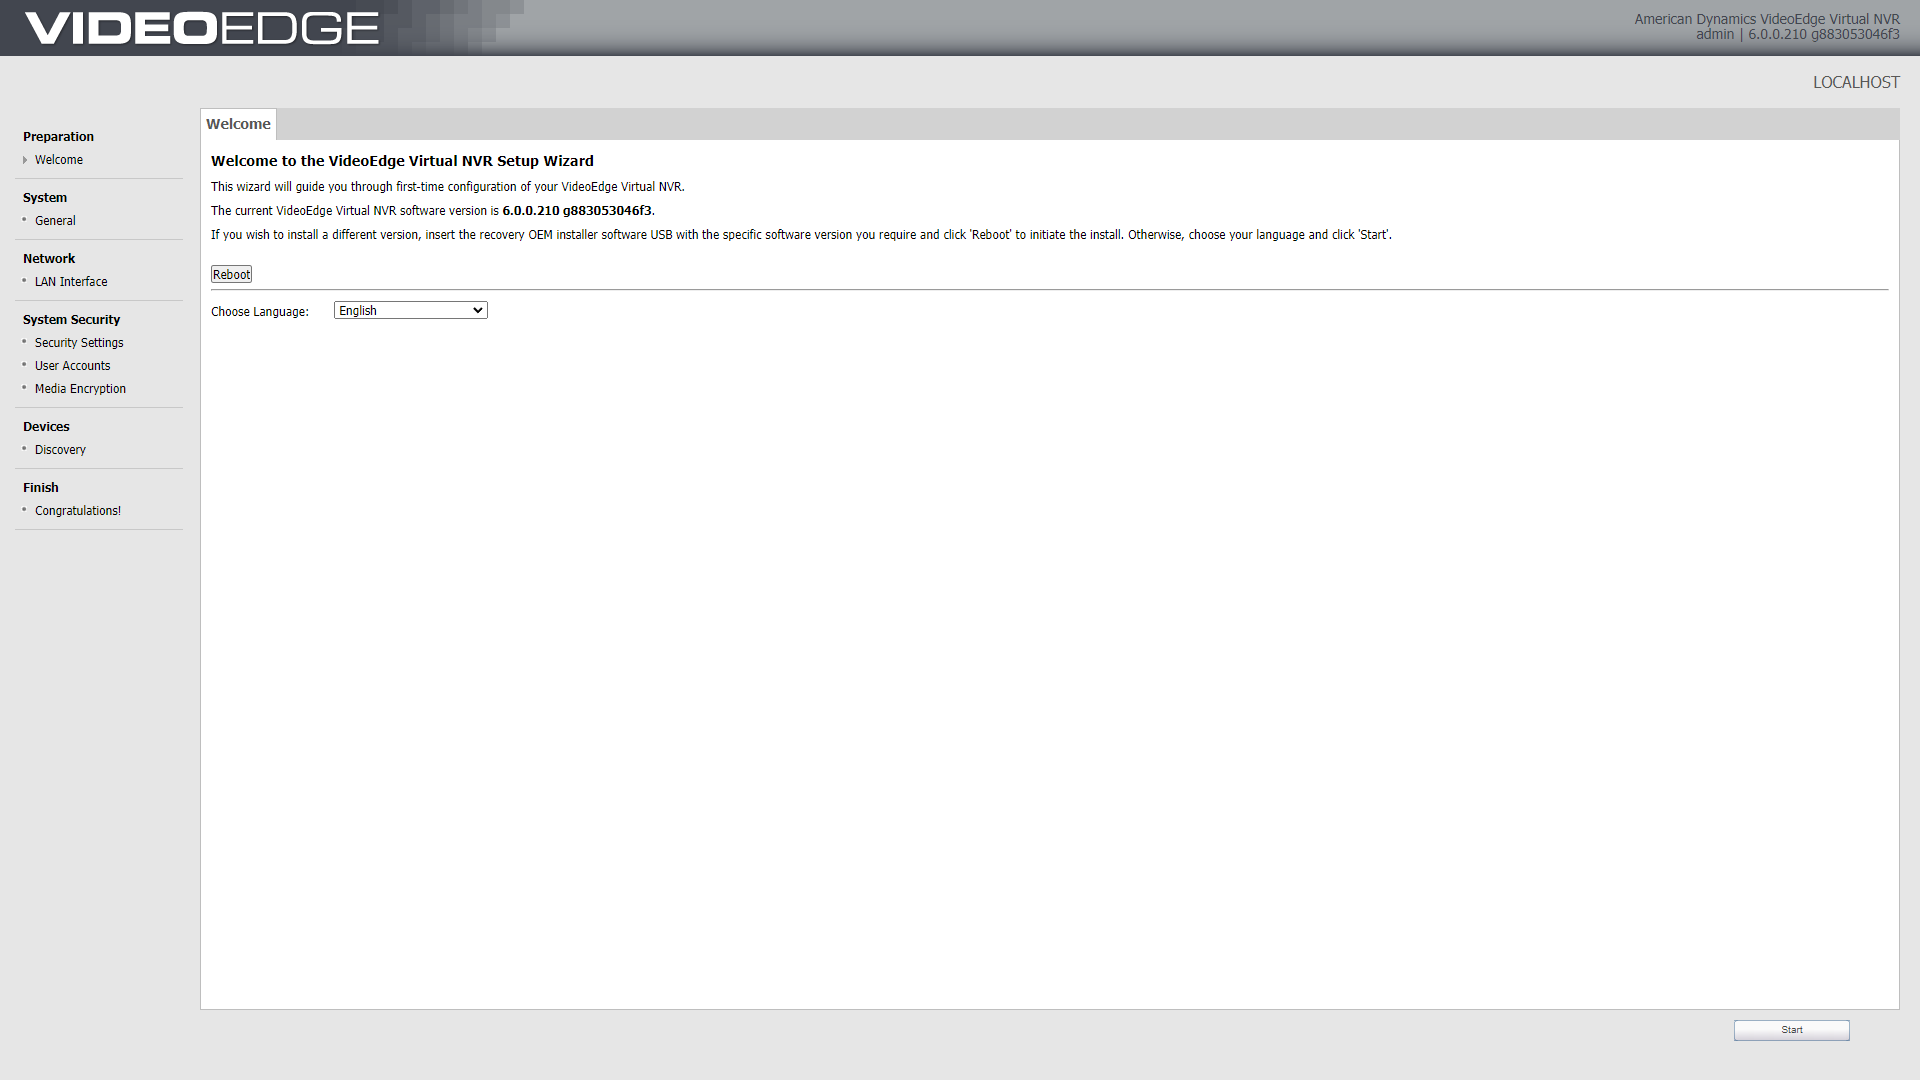
If you want to install a different version, you will need to insert a USB drive with the different version, in the VideoEdge unit.
System
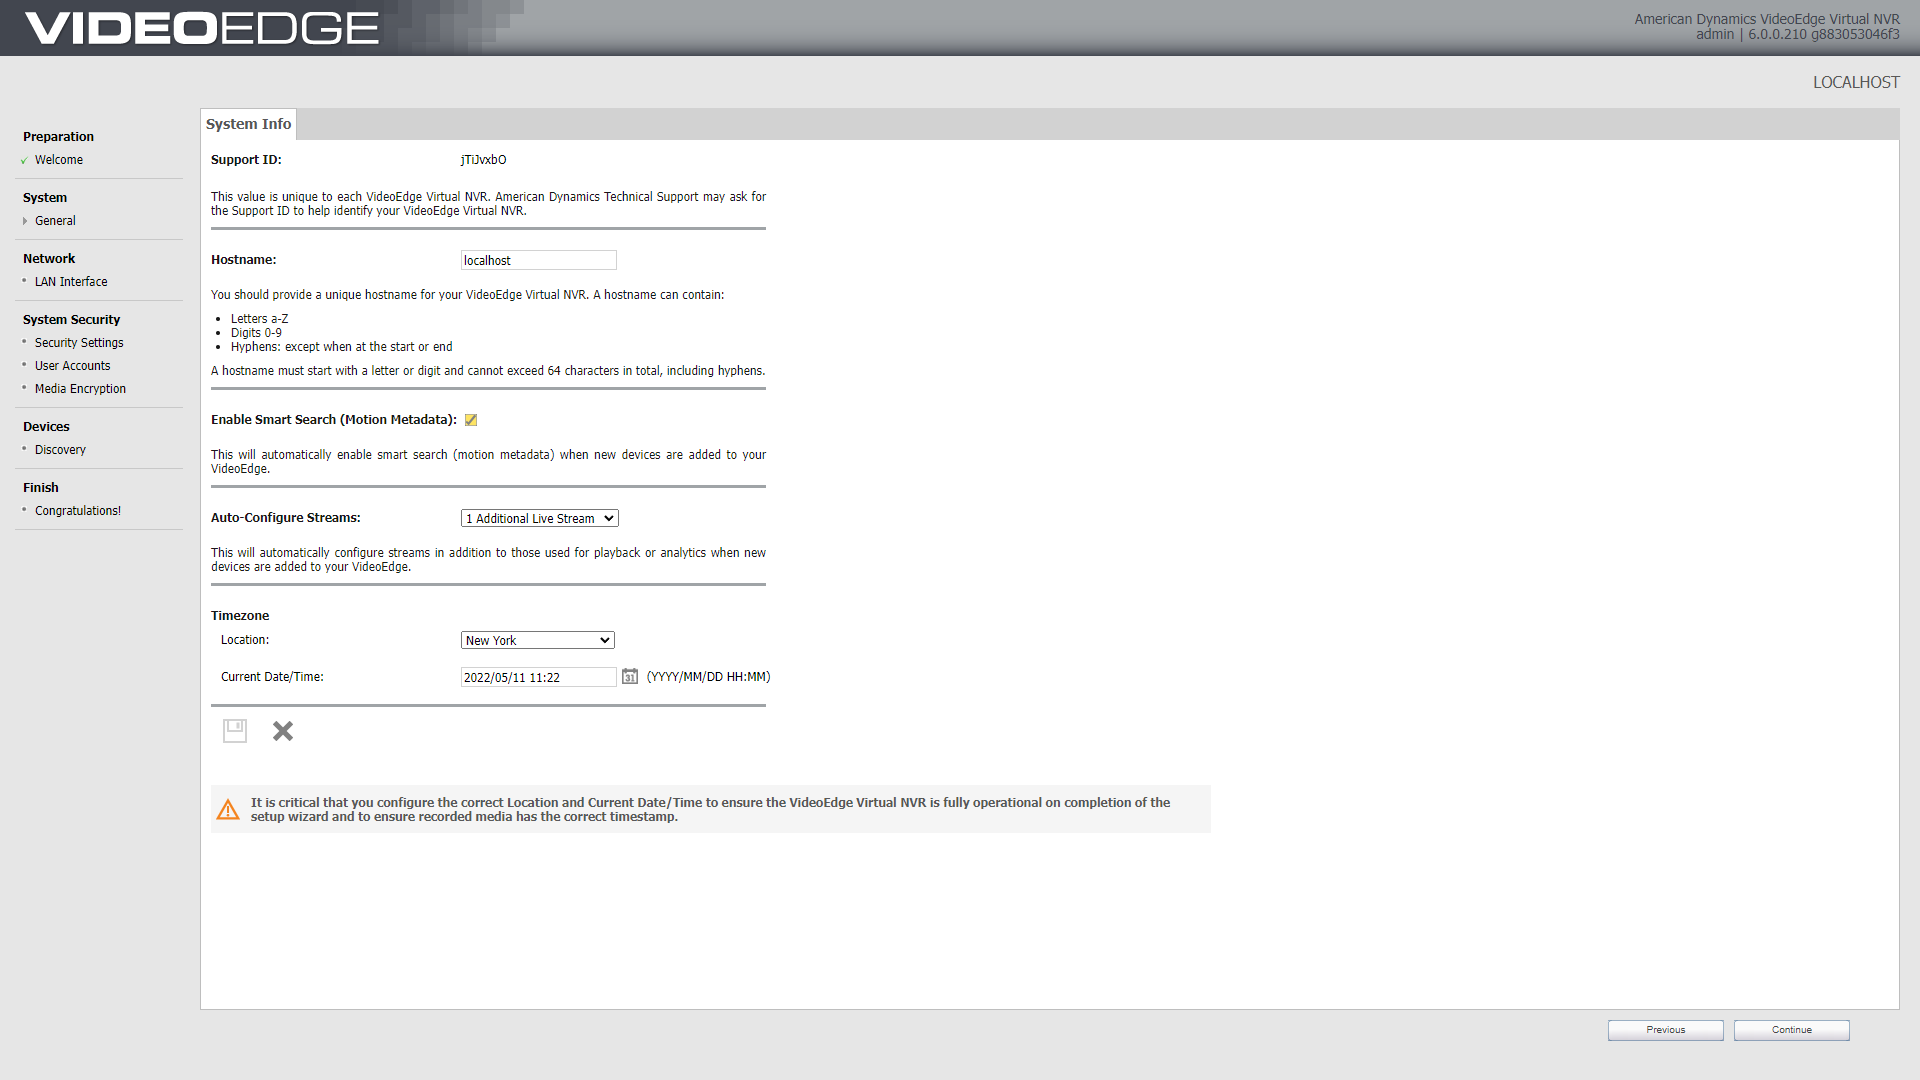
The Support ID for your VideoEdge NVR is displayed on the System Info page.
Use the System Info page to:
Set the VideoEdge Hostname
Location
Current Date/Time
and to enable or disable Smart Search.
Network
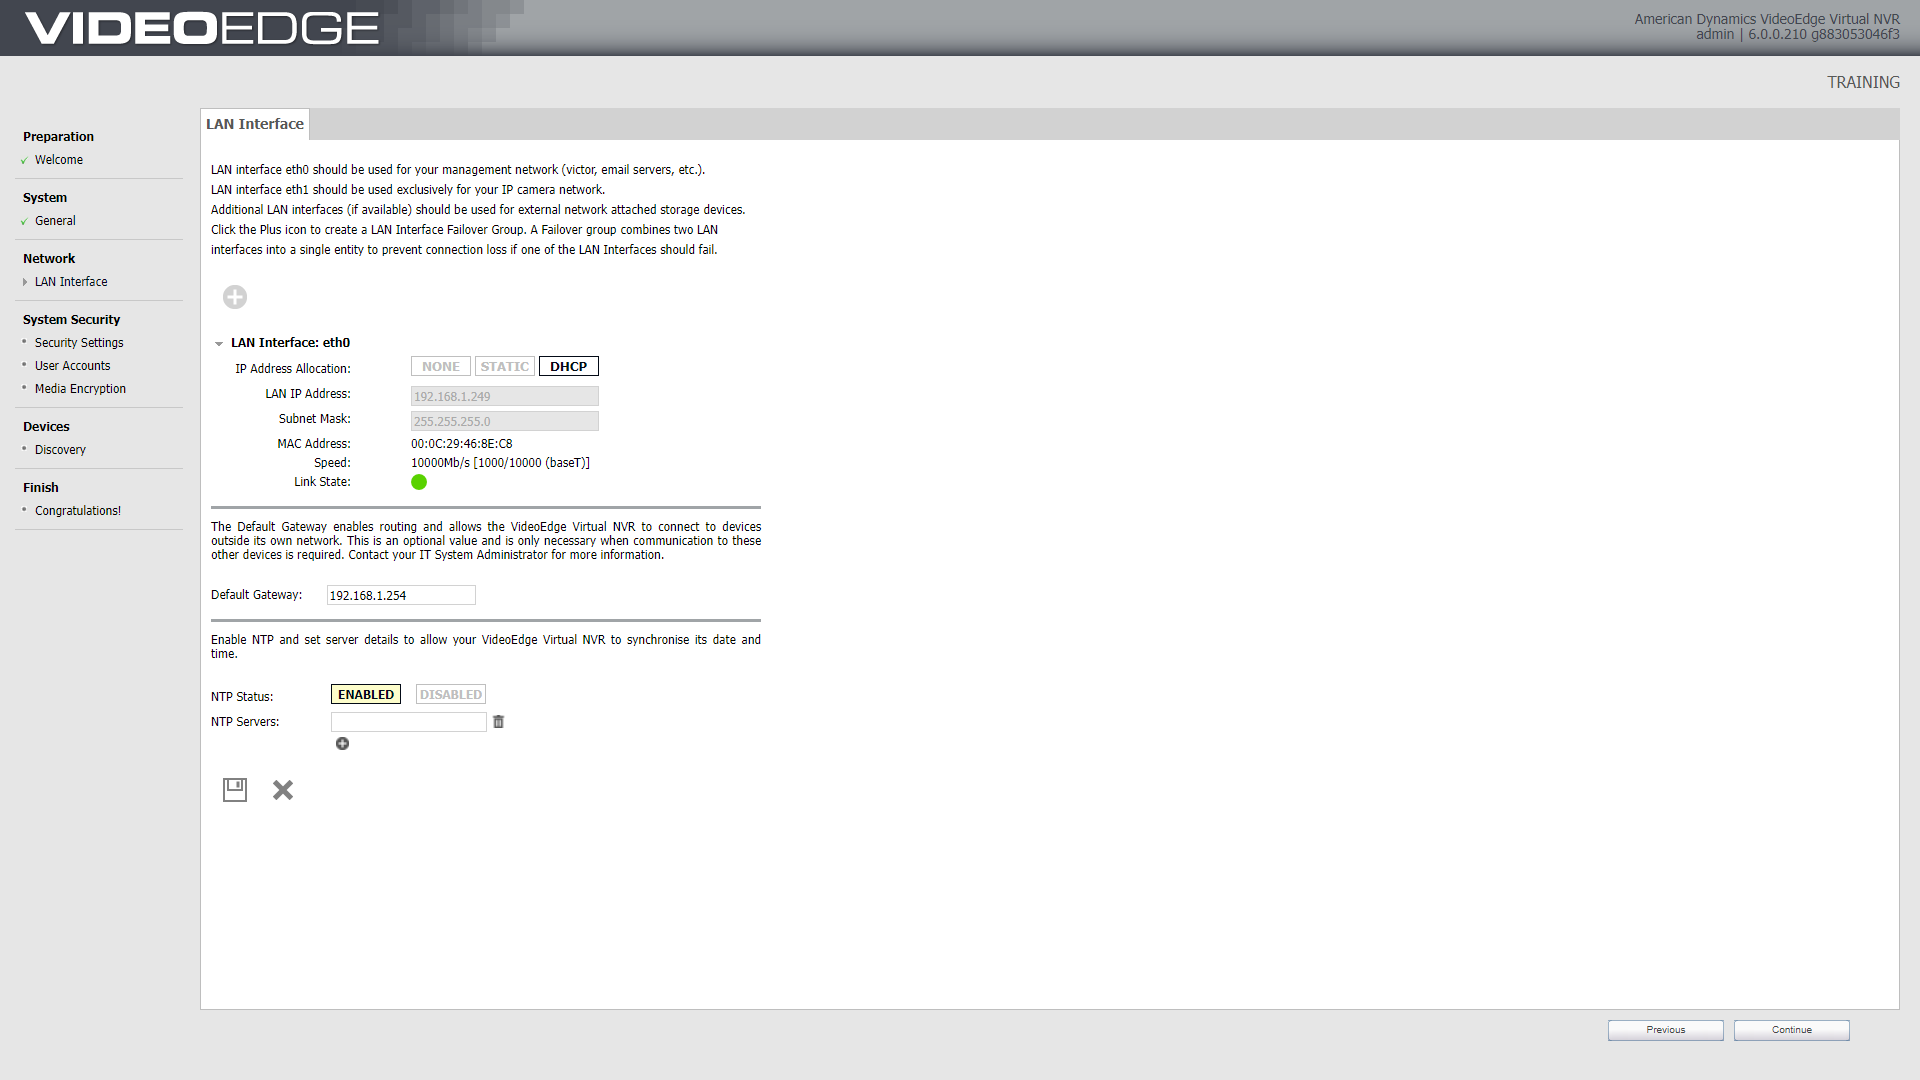
The LAN Interface page is used to edit the LAN interface settings for each NIC, including IP address allocation, LAN IP address, subnet mask and IP broadcast.
VideoEdge NVRs can have multiple active NICs, supporting the use of dedicated camera networks.
Standard practice is to segregate the VMS from the camera subnet. Generally,
eth0 is for the VMS
eth1 is for the IP cameras
eth2 is for External Storage / Archiving
eth3 is for Archiving / External Storage
System Security - Security Settings
Use the Security Settings page to set the preferred security mode for your unit.
Standard Security Mode - You are required to change the default passwords. In Standard Security Mode, universal plug and play (UPnP) is enabled by default.
Enhanced Security Mode - You are required to create new user accounts and passwords. Apart from the Optional NVR Account, all account changes on the User Accounts page are mandatory. In Enhanced Security Mode, UPnP is disabled by default and HTTPS-only mode is enforced. UPnP advertisements are enabled to allow networked devices to be discovered by victor unified client.
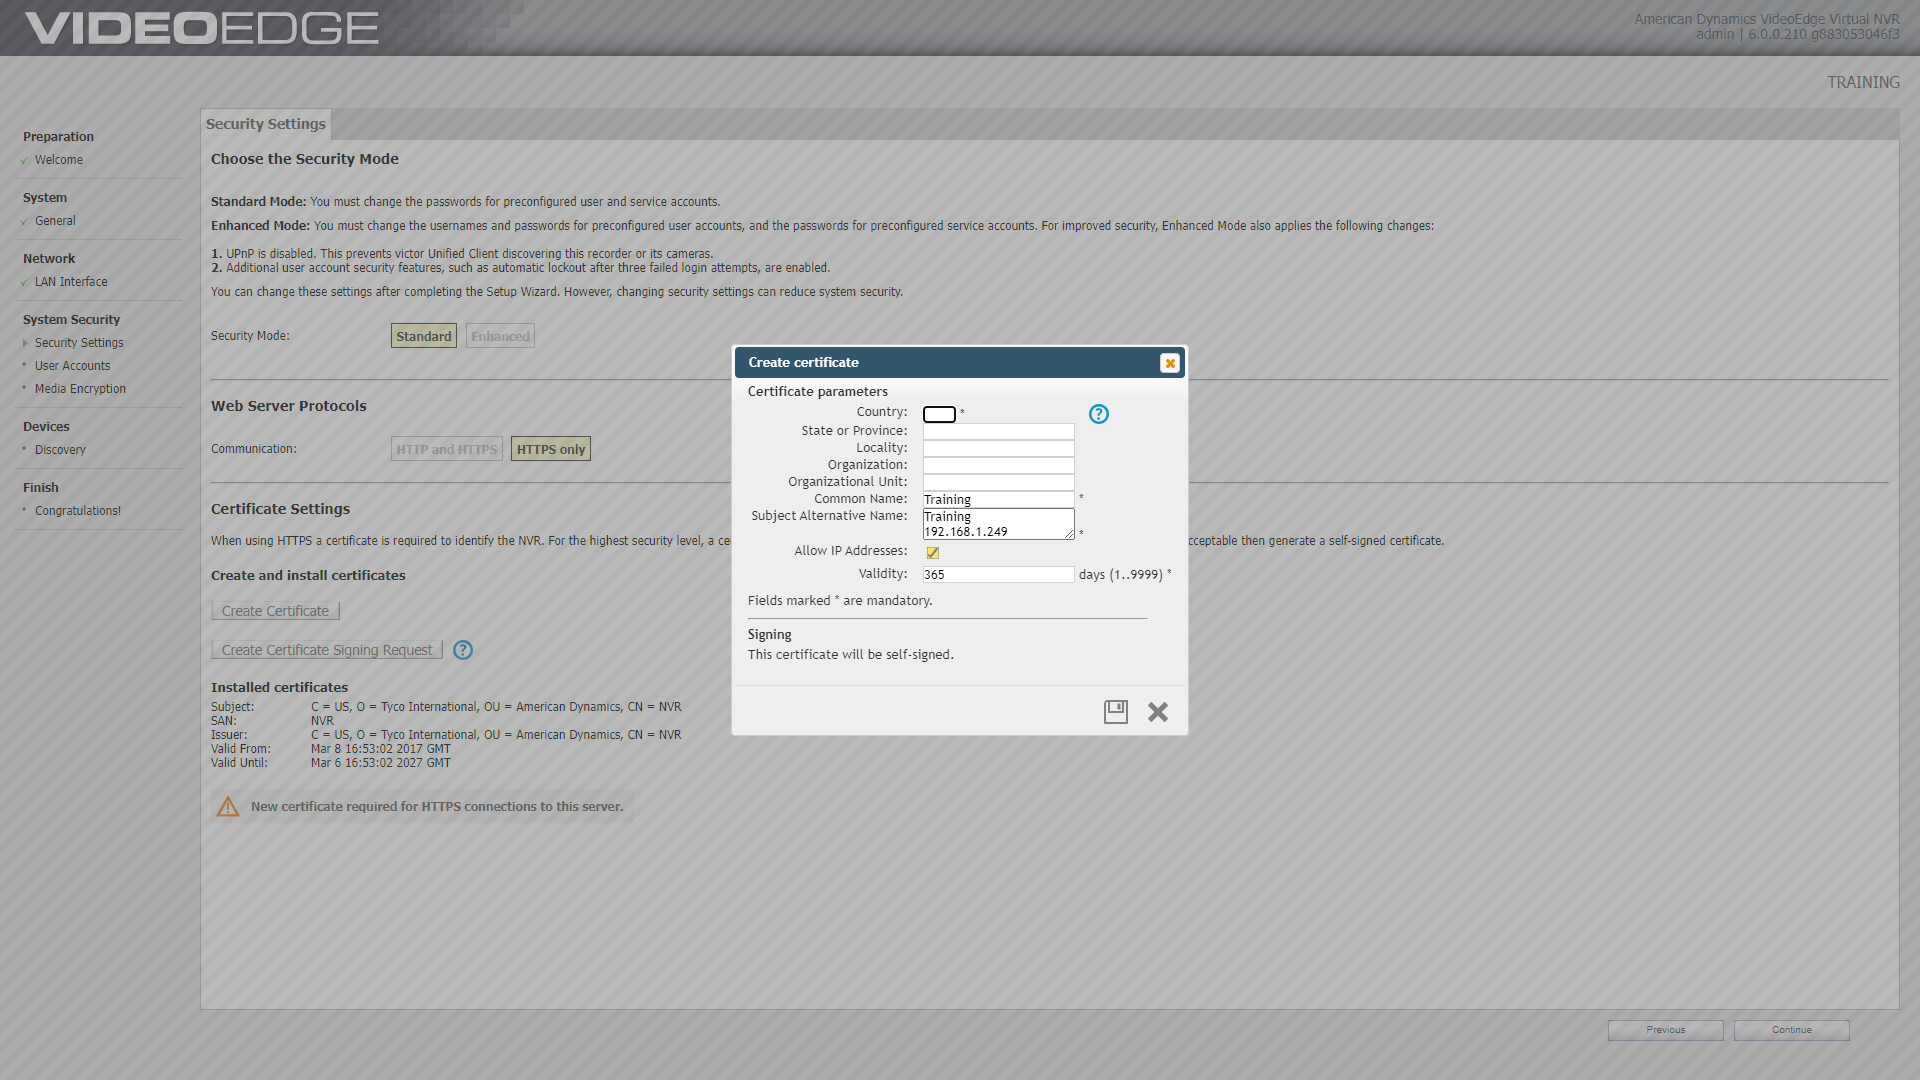
Upon completing the Setup Wizard, the selected Security Mode is final. Ensure that you have selected the appropriate mode.
To complete the System Security section in the Setup Wizard, you must create a digital certificate in the Security Settings section. If you do not want to create a certificate, revert to HTTP and HTTPS mode. You must also create new passwords for each preconfigured default user account and service account in the User Accounts section in both Standard Security Mode and Enhanced Security Mode.
System Security - User accounts
There are four preconfigured user accounts in the User Accounts page of the Setup Wizard. In Standard Security Mode, each user account has a preconfigured Username and requires a new password. In Enhanced Security Mode, each user account has a preconfigured User Role and requires a new username and a new password.
There are two types of optional NVR accounts that can be created in the User Accounts page of the Setup Wizard: Recommended NVR Accounts and Other NVR Accounts.

Optional accounts can be configured in Standard Security Mode and Enhanced Security Mode.
System Security - Media Encryption
VideoEdge media can also be encrypted to further secure your data. During the VideoEdge Setup Wizard, you will be presented with the option to enable Media Encryption if required. If you choose to encrypt your media, you must ensure that you create a system backup file to preserve your encryption key upon completion of the Setup Wizard.
You can create a system backup file at System > Backup/Restore in the VideoEdge Administration Interface. You can view the media encryption status of the NVR, import an encryption key, and export the encryption key from System > Security Configuration > Media Encryption.
After you complete the setup wizard, the selected media encryption option cannot be changed unless you reset to factory defaults with the Erase All Media option.
The encryption option uses additional resources, meaning you may find a degradation in performance.
Devices
The Discovery page shows all discoverable devices on your network that you can add to VideoEdge. You can discover multiple devices until you reach your camera license limit. However, some manufacturers require cameras to be configured before they can be added to a network, so not all cameras can be added using this method. If devices you expected to see aren't displayed, you may need to add them manually.
If you've changed your camera's password, you'll need to add a new security group because VideoEdge tries to access cameras using the default password group.

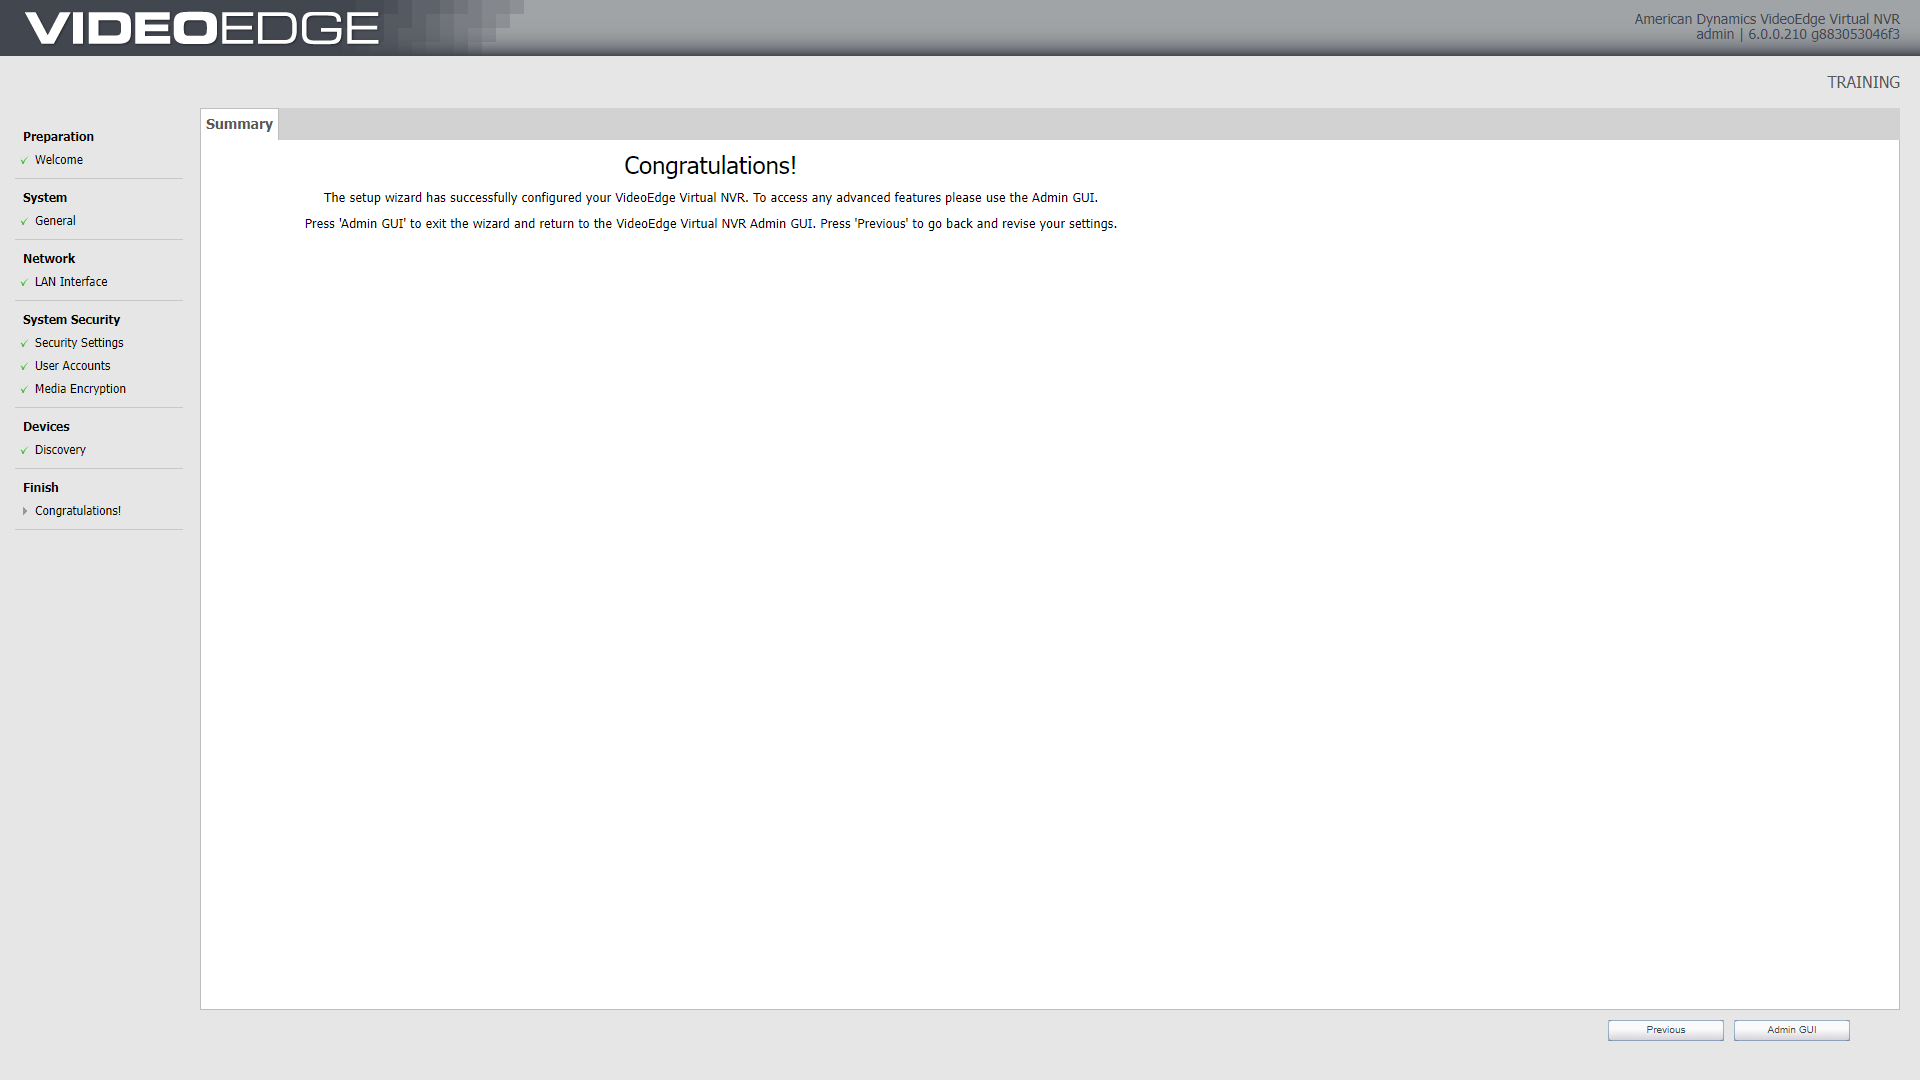
Finish
In Standard Security Mode - The Setup Wizard is now complete, and you can exit the wizard to the Administration Interface by clicking NVR Admin Client.
In Enhanced Security Mode - A final pop-up window displays.
Click OK to finish the installation in Enhanced Security Mode. You will be logged out of the desktop. Log on using your newly created VideoEdge username and password.
Click Cancel to revert to the Security Mode page. You can set up your VideoEdge NVR in Standard Security Mode if required. Accounts created during the Enhanced Security Mode setup remain.