VideoEdge 101
Introduction
In this module, we will cover the fundamental steps of configuring VideoEdge and adding cameras while on a job site. It is assumed that you have completed CCTV 101, Network 101, and Basic Install Guidelines courses. Detailed information can be accessed in subsequent modules. The primary objective of this lesson is to acquaint you with the essential tasks that a technician must perform while setting up VideoEdge on a job site.
Setting up VideoEdge involves several steps, including software installation on a NVR, configuring the basic settings through the Setup Wizard, licensing VideoEdge, configuring the network settings, and adding cameras.
Prerequisites
Table of Contents
Topics
I. Installation
Booting the NVR to the VideoEdge installation media
Logging into the Desktop and VideoEdge interface
II. The Setup Wizard
Configuring basic settings using the Setup Wizard
Explaining the different User Accounts that can be configured
III. Licensing
Differentiating the three types of licenses: Local, Centralized, and Temporary
Steps to license VideoEdge
IV. Networking Settings
Identifying the most common Network Settings, what they are, and where to find them
V. Adding Devices
Comparing the three ways to add a camera
Demonstrating how to add cameras manually
By the end of this module, learners will have a basic understanding of the steps required to set up VideoEdge, including software installation, configuration of basic settings, licensing, network settings, and adding devices.
Key Points
VideoEdge
VideoEdge is a brand of video management and recording system developed by American Dynamics. It provides advanced video surveillance capabilities for large-scale security applications, and is widely used in various industries for its reliability, scalability, and ease of use.
NVR (Network Video Recorder)
A Network Video Recorder (NVR) is a digital video recorder that records video from network-based surveillance cameras. It receives video over a computer network, allowing for greater flexibility and scalability, and typically includes software that provides advanced video management and recording capabilities.
American Dynamics (AD)
American Dynamics is a brand of Tyco Security Products, which is a part of Johnson Controls. The company specializes in the design, manufacture, and distribution of security solutions for commercial and government markets. American Dynamics' product line includes video surveillance systems, access control systems, and intrusion detection systems. They make the VideoEdge platform.
Installation
There are four main stages to setting up and installing VideoEdge:
Booting the system using a USB installation drive.
Rebooting the system after basic installation.
Logging in to the VideoEdge desktop.
Configuring VideoEdge using the Setup Wizard.
This training document will provide detailed steps for each of these, and by the end you should be comfortable installing and configuring VideoEdge.
If VideoEdge is already installed you can skip to the Logging into VideoEdge section
Any previously configured OS on this system will be removed and overwritten
Booting the system using the USB drive.
To begin the VideoEdge installation process, you will need to boot the NVR to the VideoEdge installation media. To do so, follow these steps:
Insert the VideoEdge USB drive into one of the available USB ports on your computer/server.
Power on or Restart your system to boot VideoEdge from the USB drive.
From the installation options menu, select Install/Restore_VideoEdge_NVR_Release_x.x.x.xxx, where x.x.x.xxx refers to the software version being installed, and press Enter.
After approximately 20 seconds, the installation will start automatically. This process may take several minutes.
During the installation, the VideoEdge software will install the minimum required Linux Operating System to run the VideoEdge system.
Pro Tip: If VideoEdge does not boot from the disk, look for a boot options key on the startup screen and press it before OS starts to load. Common Boot Options keys are ESC, F1, F2, F8, F10, F12, or Del.
Rebooting the system after basic installation
When the license agreement is displayed, select Yes, I Agree to agree to the license agreement.
After the self-installer has completed, remove the USB drive and click Reboot NVR when prompted.
If the USB is not removed BEFORE reboot, it will prompt the system to install the software again.
3. On the boot options screen, ensure that VideoEdge is selected, and press Enter to continue.
Logging into the VideoEdge Desktop
When the system boots to the VideoEdge login screen, log in to the VideoEdge desktop to continue the installation and configuration process.
Enter the Username. The default username is VideoEdge.
Enter the Password. The default password is VideoEdge.
Click Log In.
Logging into the VideoEdge Administration Interface
After installing VideoEdge, users must configure the basic settings using the setup wizard. The setup wizard will launch automatically the first time you log in to the Administration Interface after installation.
To proceed with the setup wizard, follow these steps:
Launch the VideoEdge Administration Interface by double-clicking the icon on the desktop.
Log into the Administration Interface
Username: admin
Password: admin
In the next section, we will cover using the Setup Wizard to configure VideoEdge.
https://youtu.be/RE1LMfkeEfgFor security reasons, the VideoEdge desktop will automatically lock and display a screensaver after 10 minutes of inactivity. To release the screen lock, simply click on the window or press any key to display an unlock prompt screen. Note that the screen lock can also activate during the initial install process. In this case, use "root" as the password on the unlock prompt screen when the VideoEdge OS installation window locks.
Please note that if VideoEdge Client is open when the screen locks after 10 minutes of inactivity, the screensaver will not be shown. VideoEdge Client will continue to be displayed on the screen. Once the user moves their mouse, the unlock prompt screen will appear.
Setup Wizard
The Setup Wizard will guide you through configuring the basic settings of VideoEdge. The wizard will launch automatically when the interface is accessed for the first time after installation.
Pro Tip: If you leave the wizard before completing all the steps, your progress will be saved, and you can resume where you left off when you return to it.
The wizard includes the following menus to configure relevant settings:
Preparation
System
Network
System Security - Security Settings
System Security - User Accounts
System Security - Media Encryption
Devices
In this section, we will go over each of these menus, their primary purpose, and commonly adjusted settings. Advanced or uncommon settings will be covered in later modules, for now we will just focus on the basics.
Preparation
The Welcome page is the first page of the Setup Wizard, and the settings on this page should typically be left as default.
From the Welcome page, users can:
Select the language in which the Administration Interface will be displayed.
View the current version of the VideoEdge software or install a different version of the VideoEdge software.
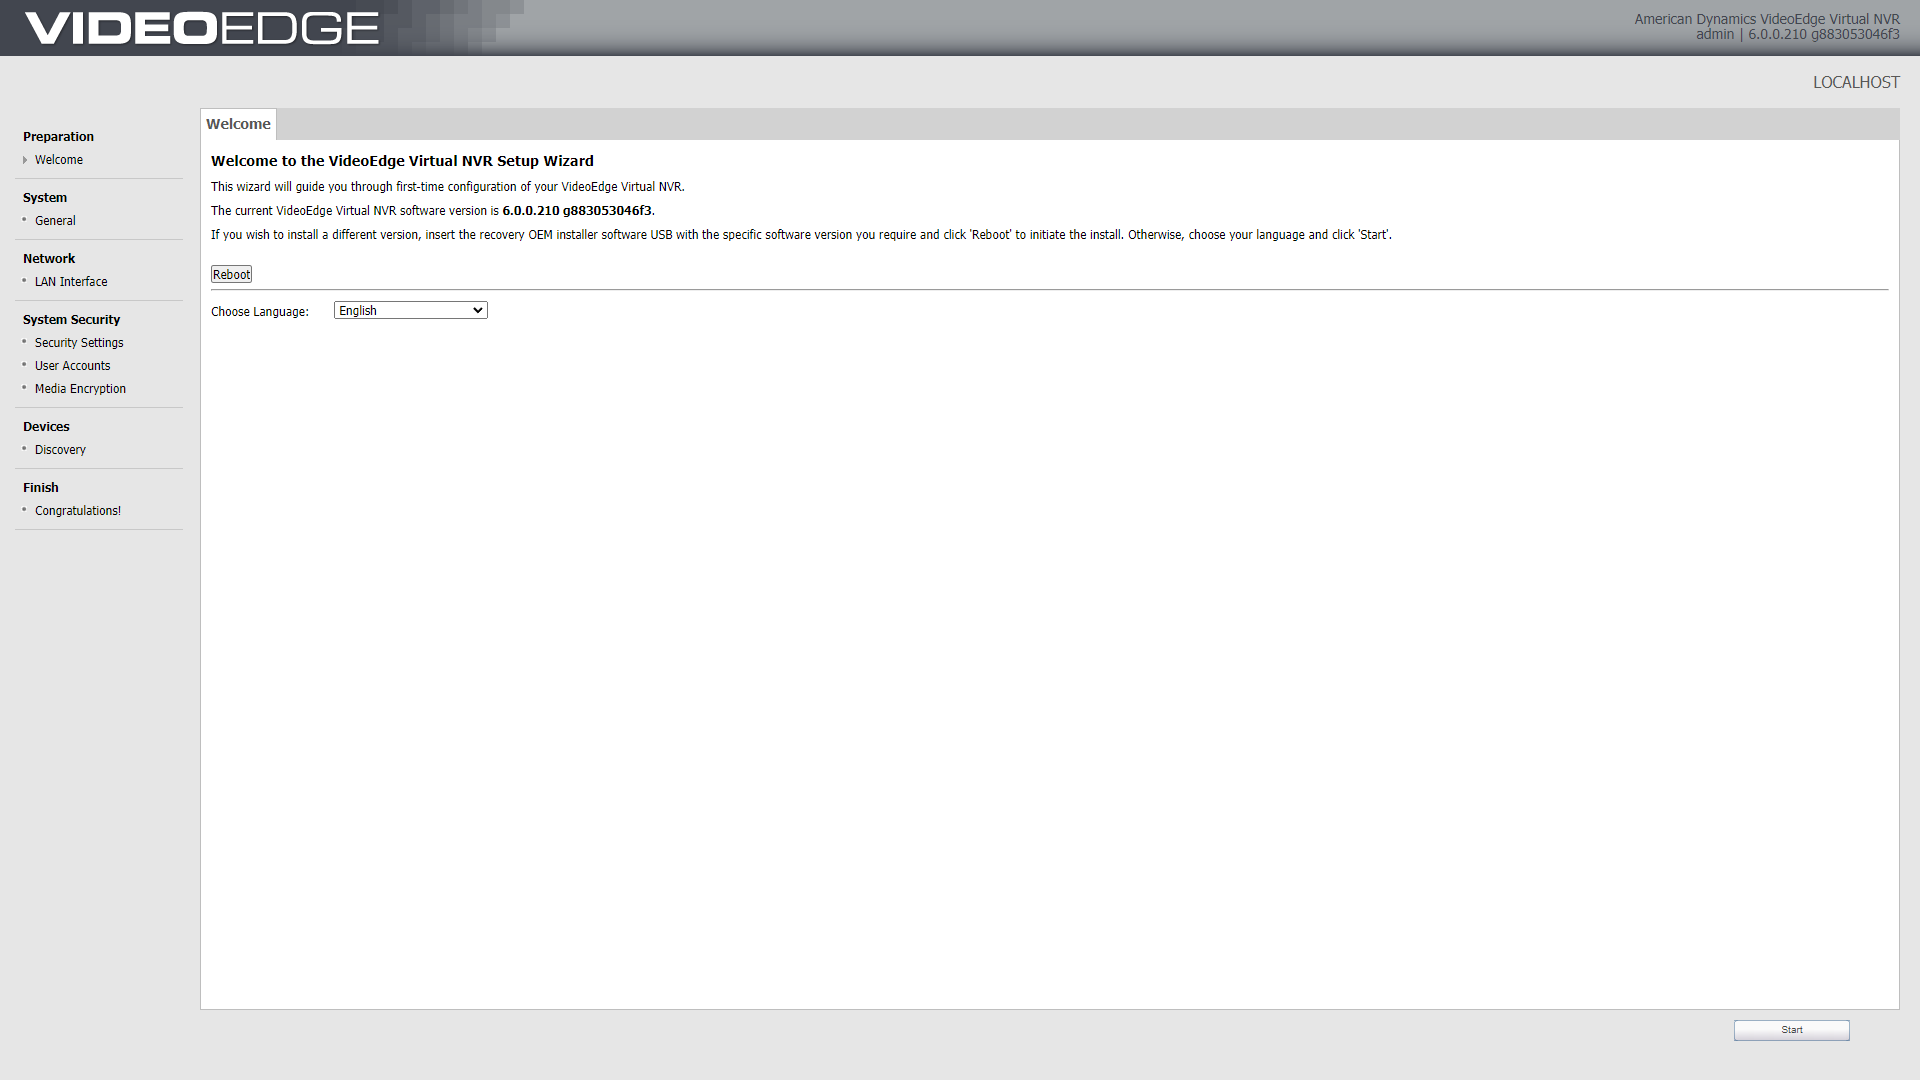
Pro Tip: The Preperation Screen says that you need to insert recovery media to install a different version of VideoEdge. While that will work, you will only need to use recovery media to install a different version if you are downgrading to a lower version. Upgrading can be done without recovery media, and will be covered in a later module.
System
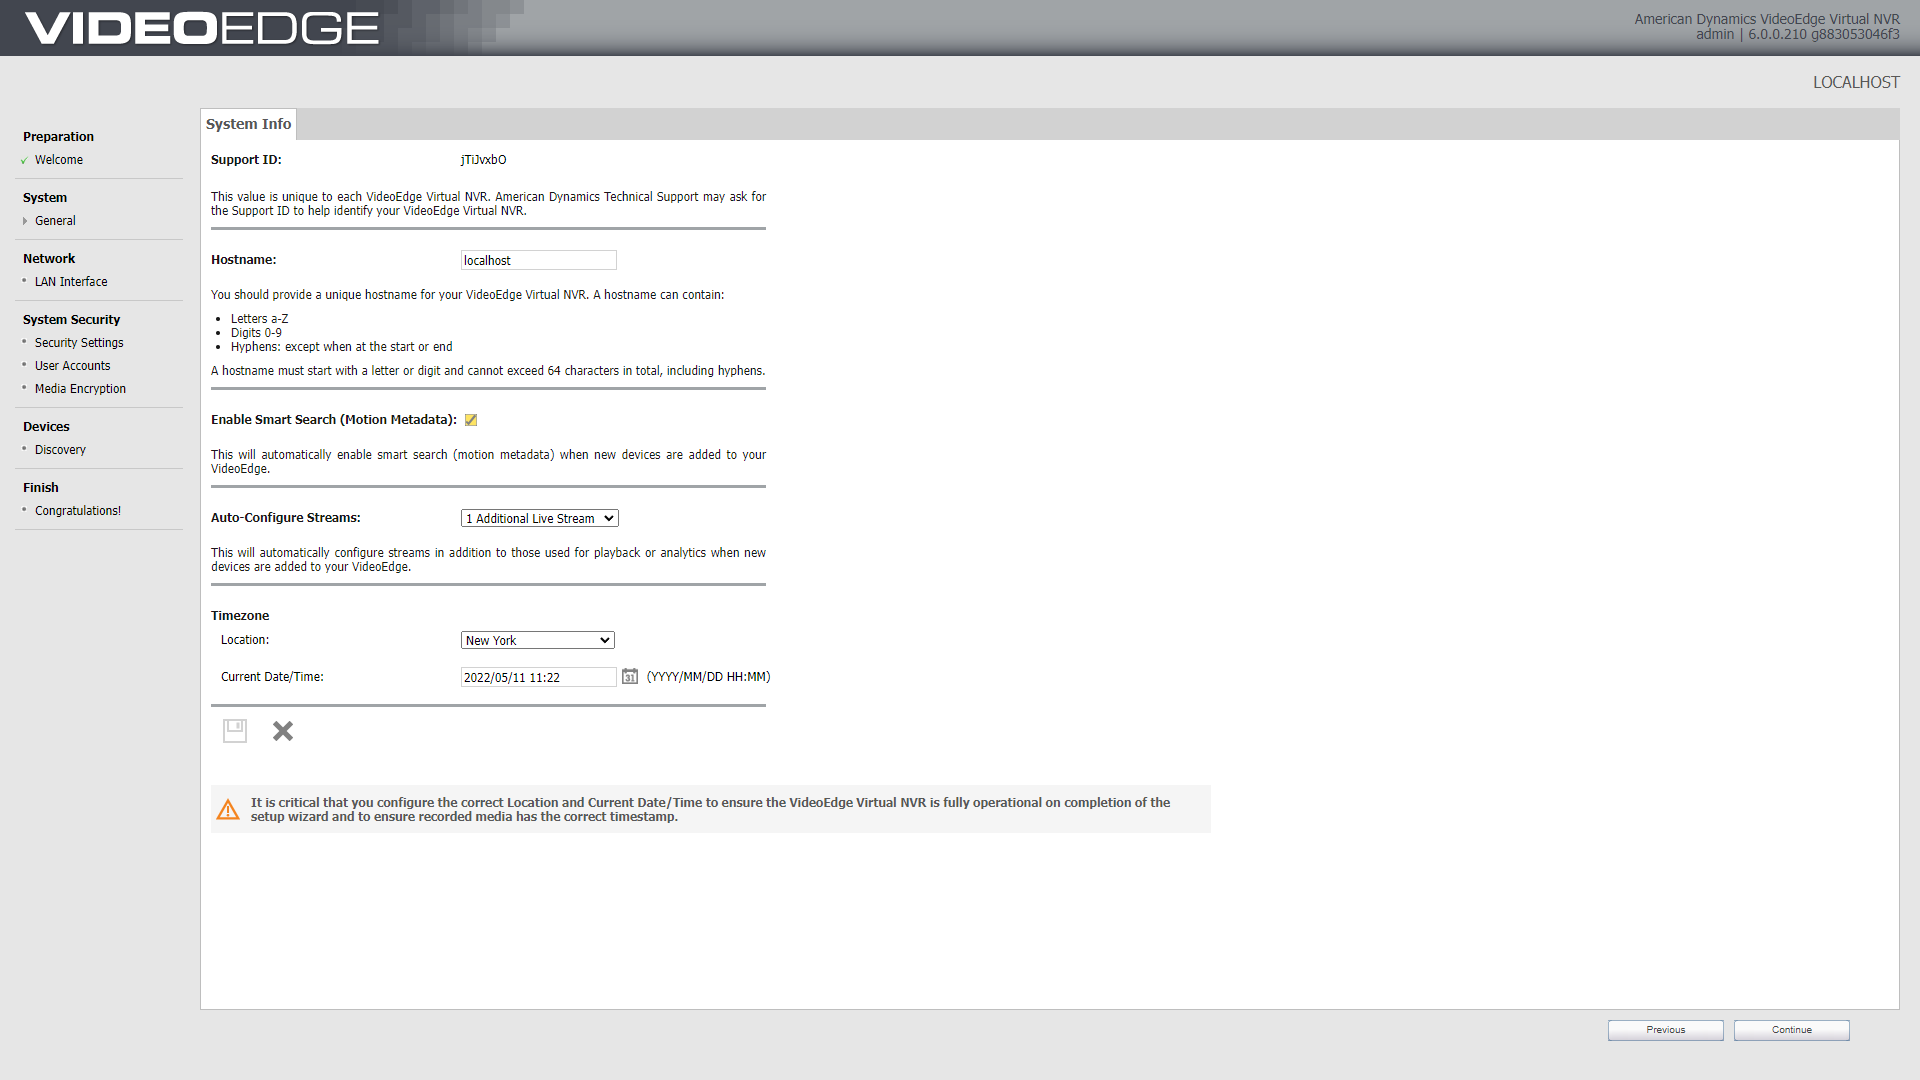
The System Info page displays the Support ID for your VideoEdge NVR.
Use the System Info page to:
Set the VideoEdge Hostname
A Hostname is used as a “human identifiable” name. Almost always the job site will have naming conventions they want us to follow.
Set the Location
Set the Current Date/Time
Enable or disable Smart Search.
Most of the time smart search will be enabled but be sure to consult the standards sheet for the individual customer to be sure.
Network
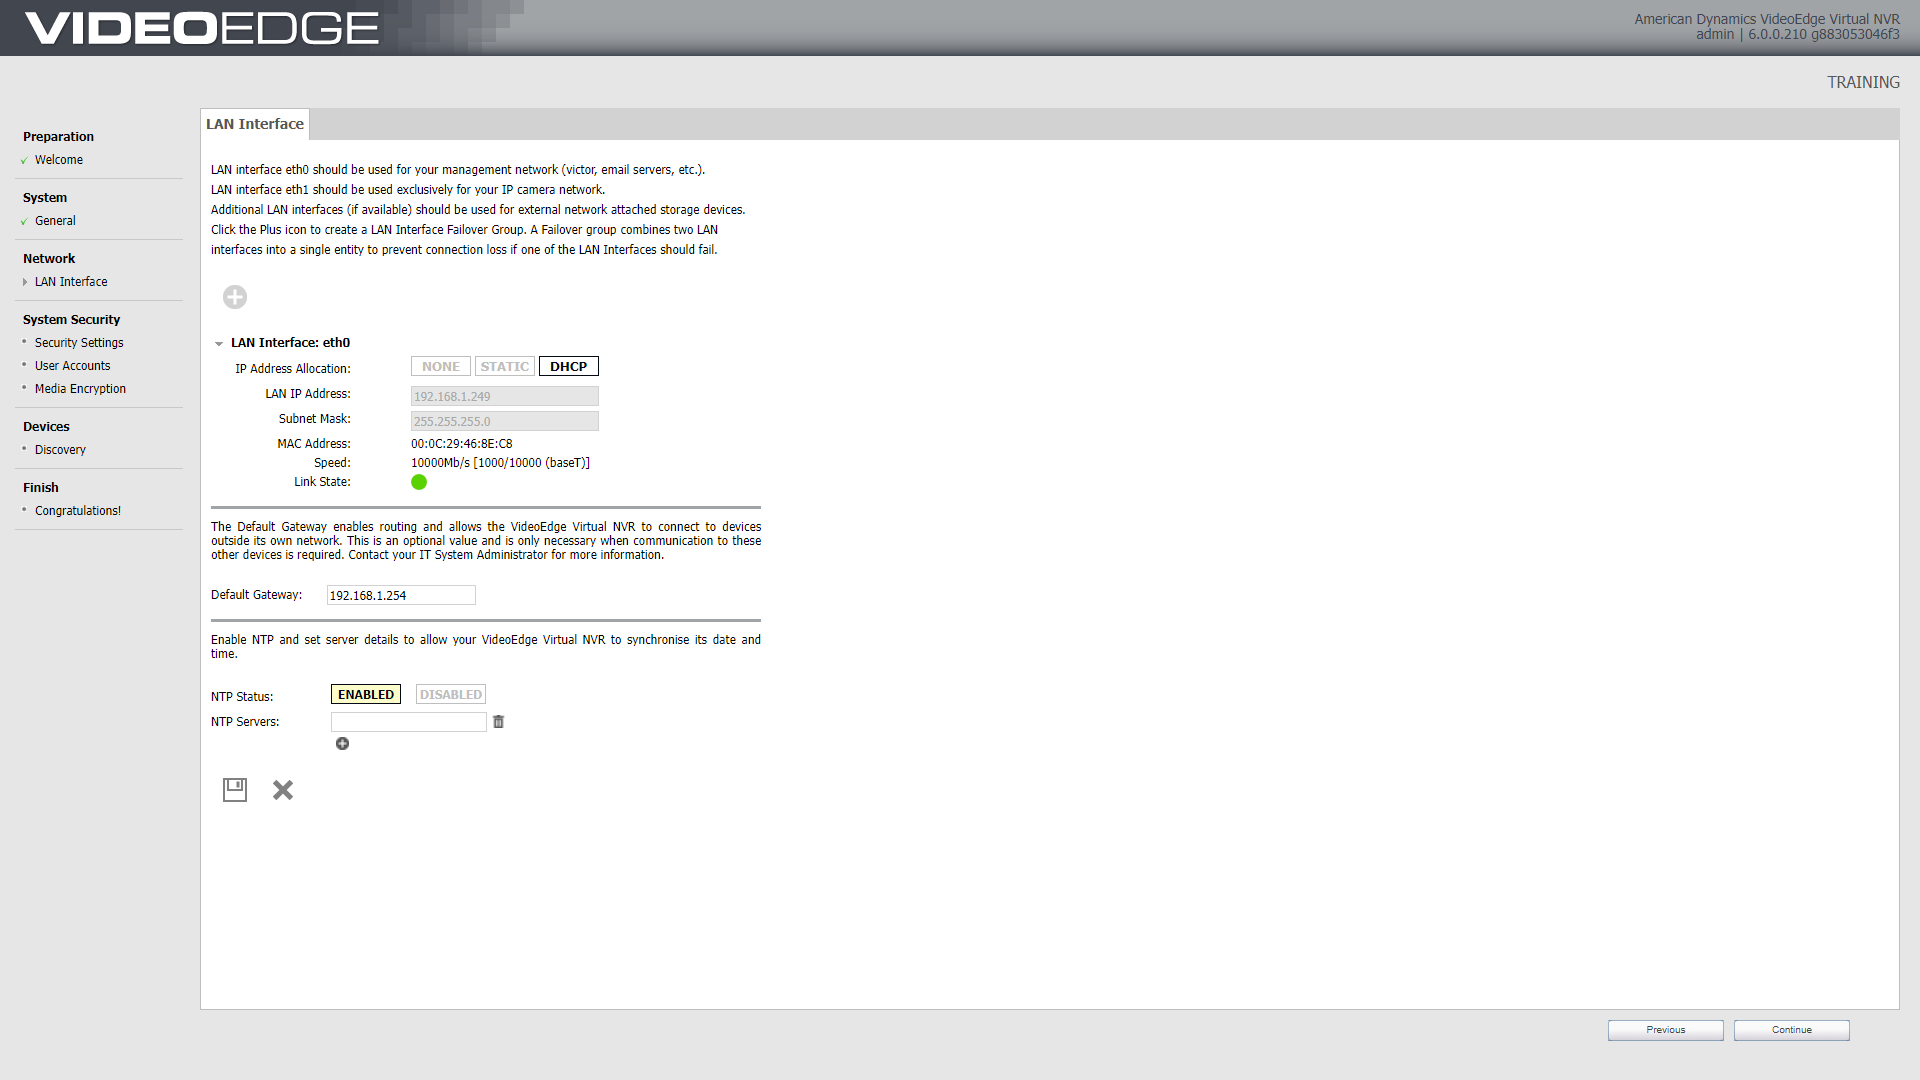
The LAN Interface page is where users can edit the LAN interface settings for each Network Interface Card (NIC). This includes:
IP address allocation
LAN IP address
Subnet mask
IP broadcast.
Pro Tips:
VideoEdge NVRs can have multiple active NICs, supporting the use of dedicated camera networks
Standard practice is to segregate the VMS from the camera subnet. While this will vary depending on the job site, American Dynamics suggests the following:
eth0 is for the VMS
eth1 is for the IP cameras
eth2 is for External Storage / Archiving
eth3 is for Archiving / External Storage
System Security - Security Settings
The Security Settings page is used to set and customize the preferred security mode for your unit.
Notes:
Generally Speaking you will leave this set to Standard security.
Enhanced Security will be covered in a later module
HTTP or HTTPS will be determined by the client on a job by job basis
HTTPS will require creating a digital certificate. This will be covered in a later module
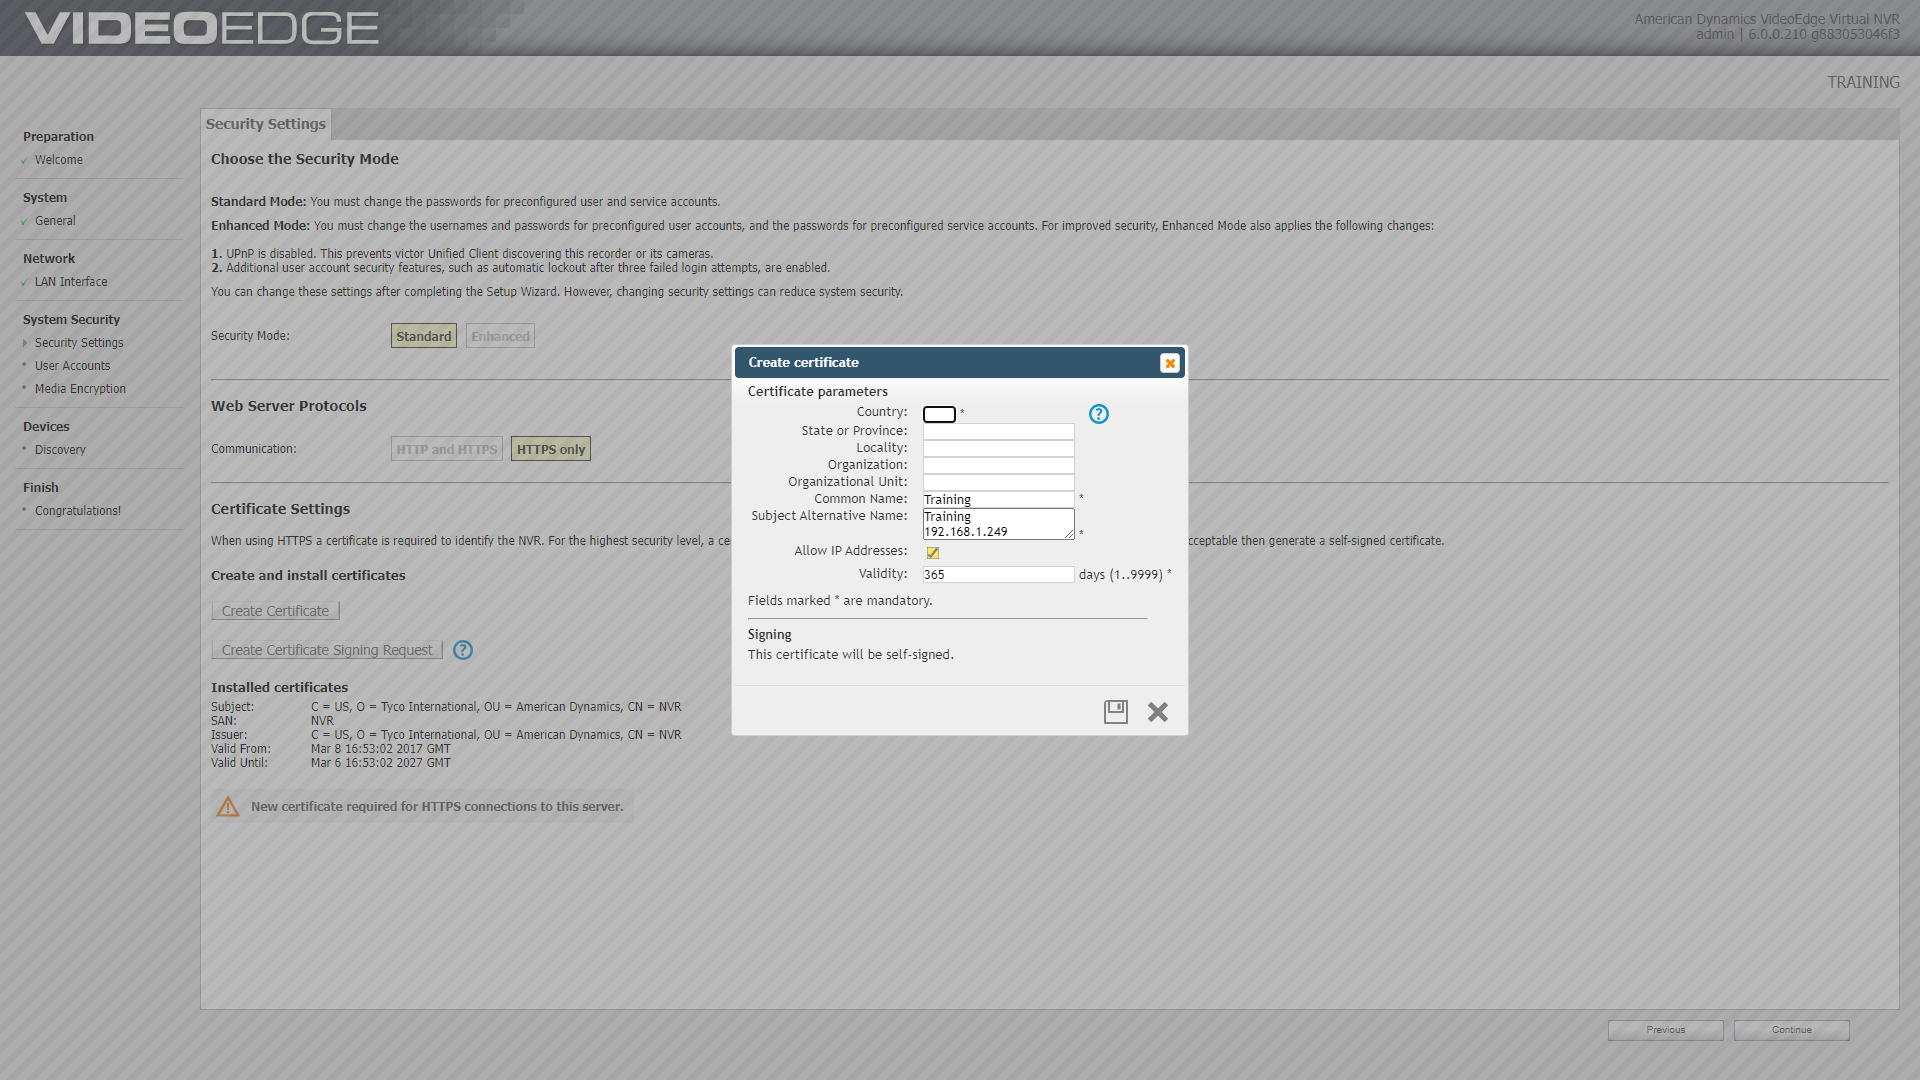
Upon completing the Setup Wizard, the selected Security Mode is final. Ensure that you have selected the appropriate mode.
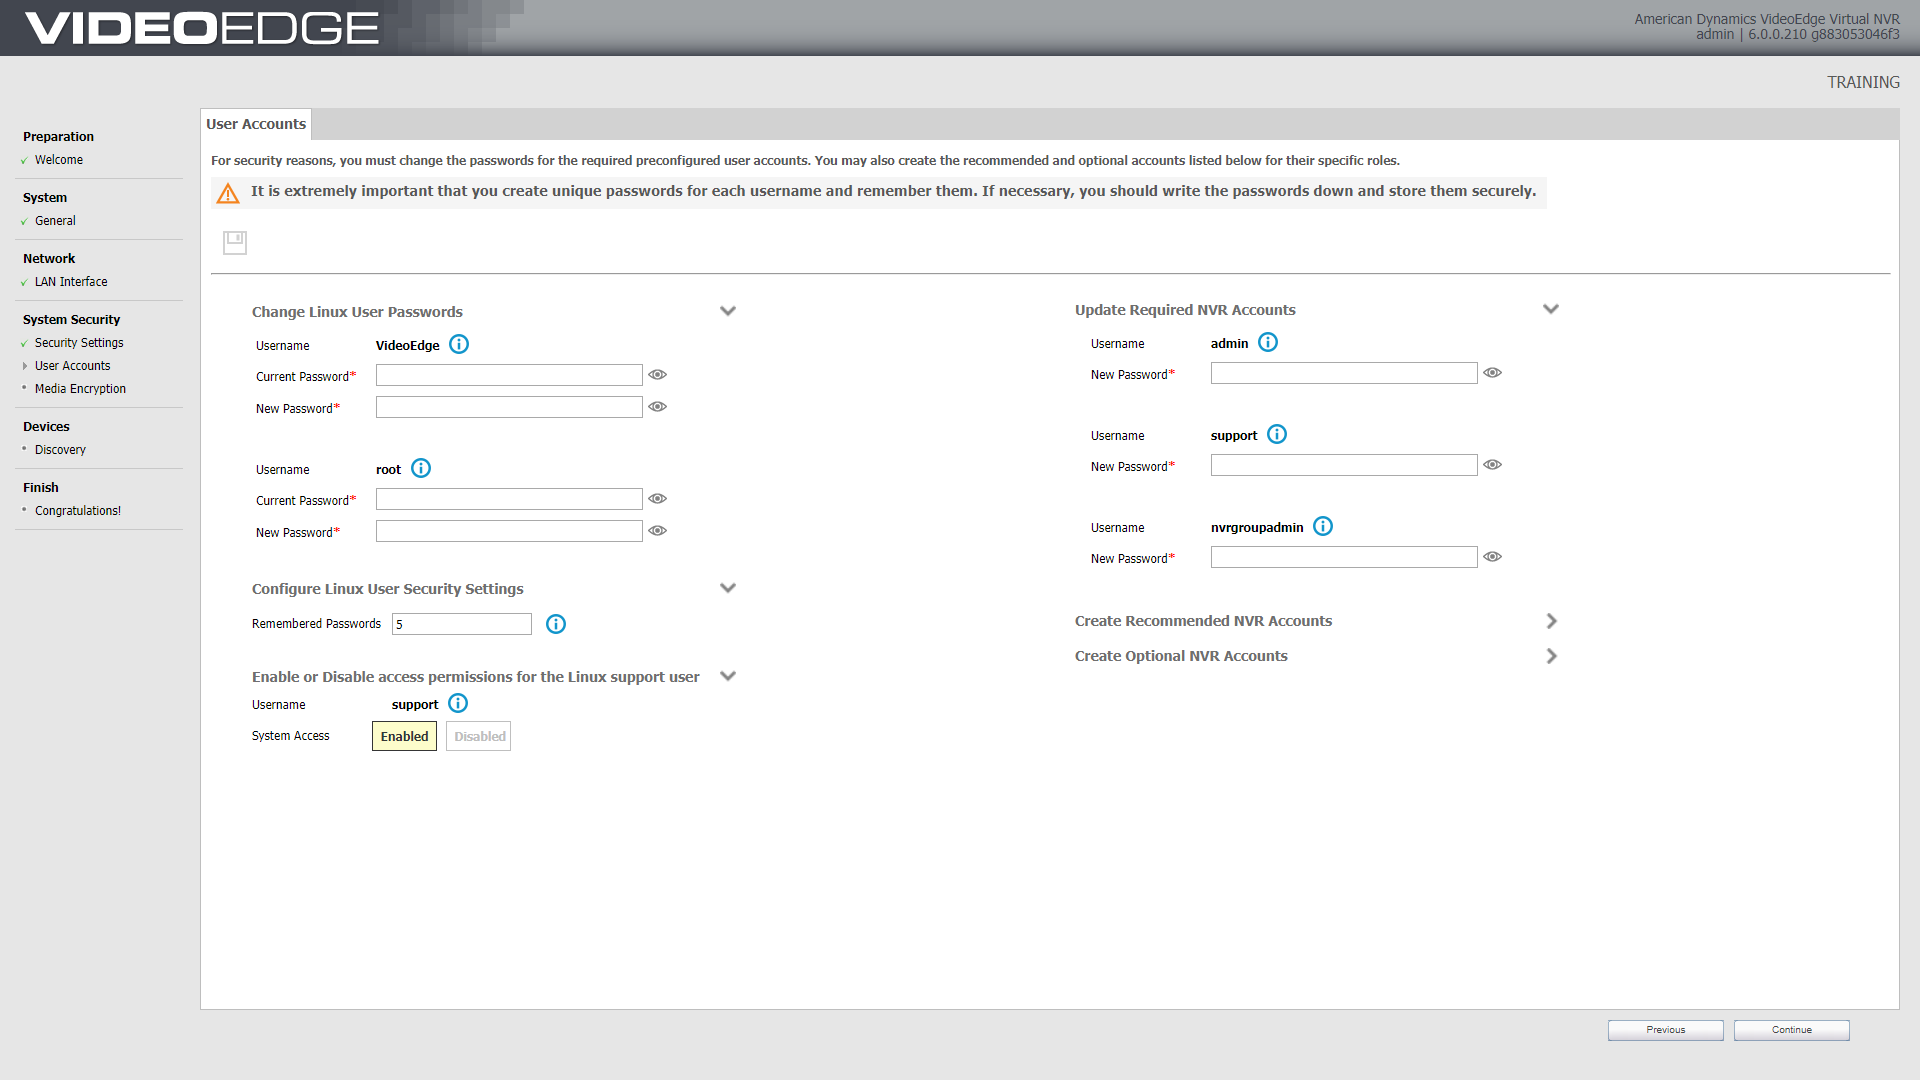
System Security - User accounts
In Standard Security Mode, each user account has a preconfigured username and requires a new password.
The User Accounts page of the Setup Wizard allows for the creation of two types of optional NVR accounts: Recommended NVR Accounts and Other NVR Accounts.
Desktop Accounts
VideoEdge
The primary account to sign into the Linux Desktop. The default password is VideoEdge
Root
The Super User account for the Linux Desktop Environment
Pre-made User Accounts
Required Accounts
admin
Allows viewing and editing of the VideoEdge Administration Interface and full functionality of the VideoEdge Client. The default password for this role is admin
support
The support user role has access to additional troubleshooting menus.
nvrgroupadmin
This user credential is used for communication between NVRs in a group.
Recommended Accounts
softwareadmin
Allows access to the software update page only. This credential is used solely for carrying out software updates and installing camera handler packs.
operator
Allows viewing of the VideoEdge Administration Interface and full functionality of the VideoEdge
Client. The default password for this role is operator.
snmpuser
This user credential is used for SNMP communication between NVRs in a group.
Pro Tips:
Take extra precautions to ensure the root password is set correctly. No other accounts have the ability to change it in the event of a typo.
If you make a typo when setting the admin account password, the support account can assist you with changing it.
System Security - Media Encryption
VideoEdge media can also be encrypted to further secure data. This setting will usually be disabled on most client sites, and as such will not be covered in-depth in this module. Further information can be found in VideoEdge 201 - Installation
After you complete the setup wizard, the selected media encryption option cannot be changed unless you reset to factory defaults with the Erase All Media option.
The encryption option uses additional resources, as such there may be a degradation in performance.
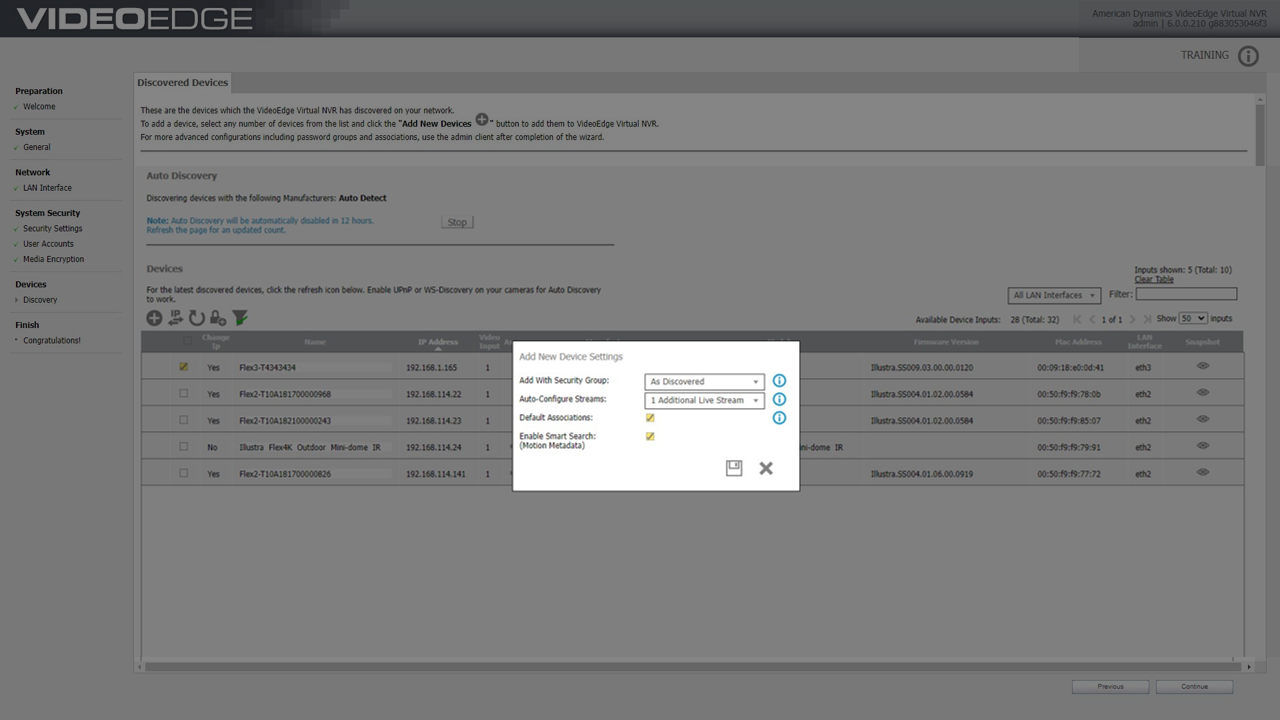
Devices
The Discovery page shows all discoverable devices on your network that you can add to VideoEdge.
You can discover multiple devices until you reach the camera license limit.
Some manufacturers require cameras to be configured before they can be added to a network, so not all cameras can be added using this method.
If you've changed your camera's password, you'll need to add a new security group because VideoEdge tries to access cameras using the default password group.
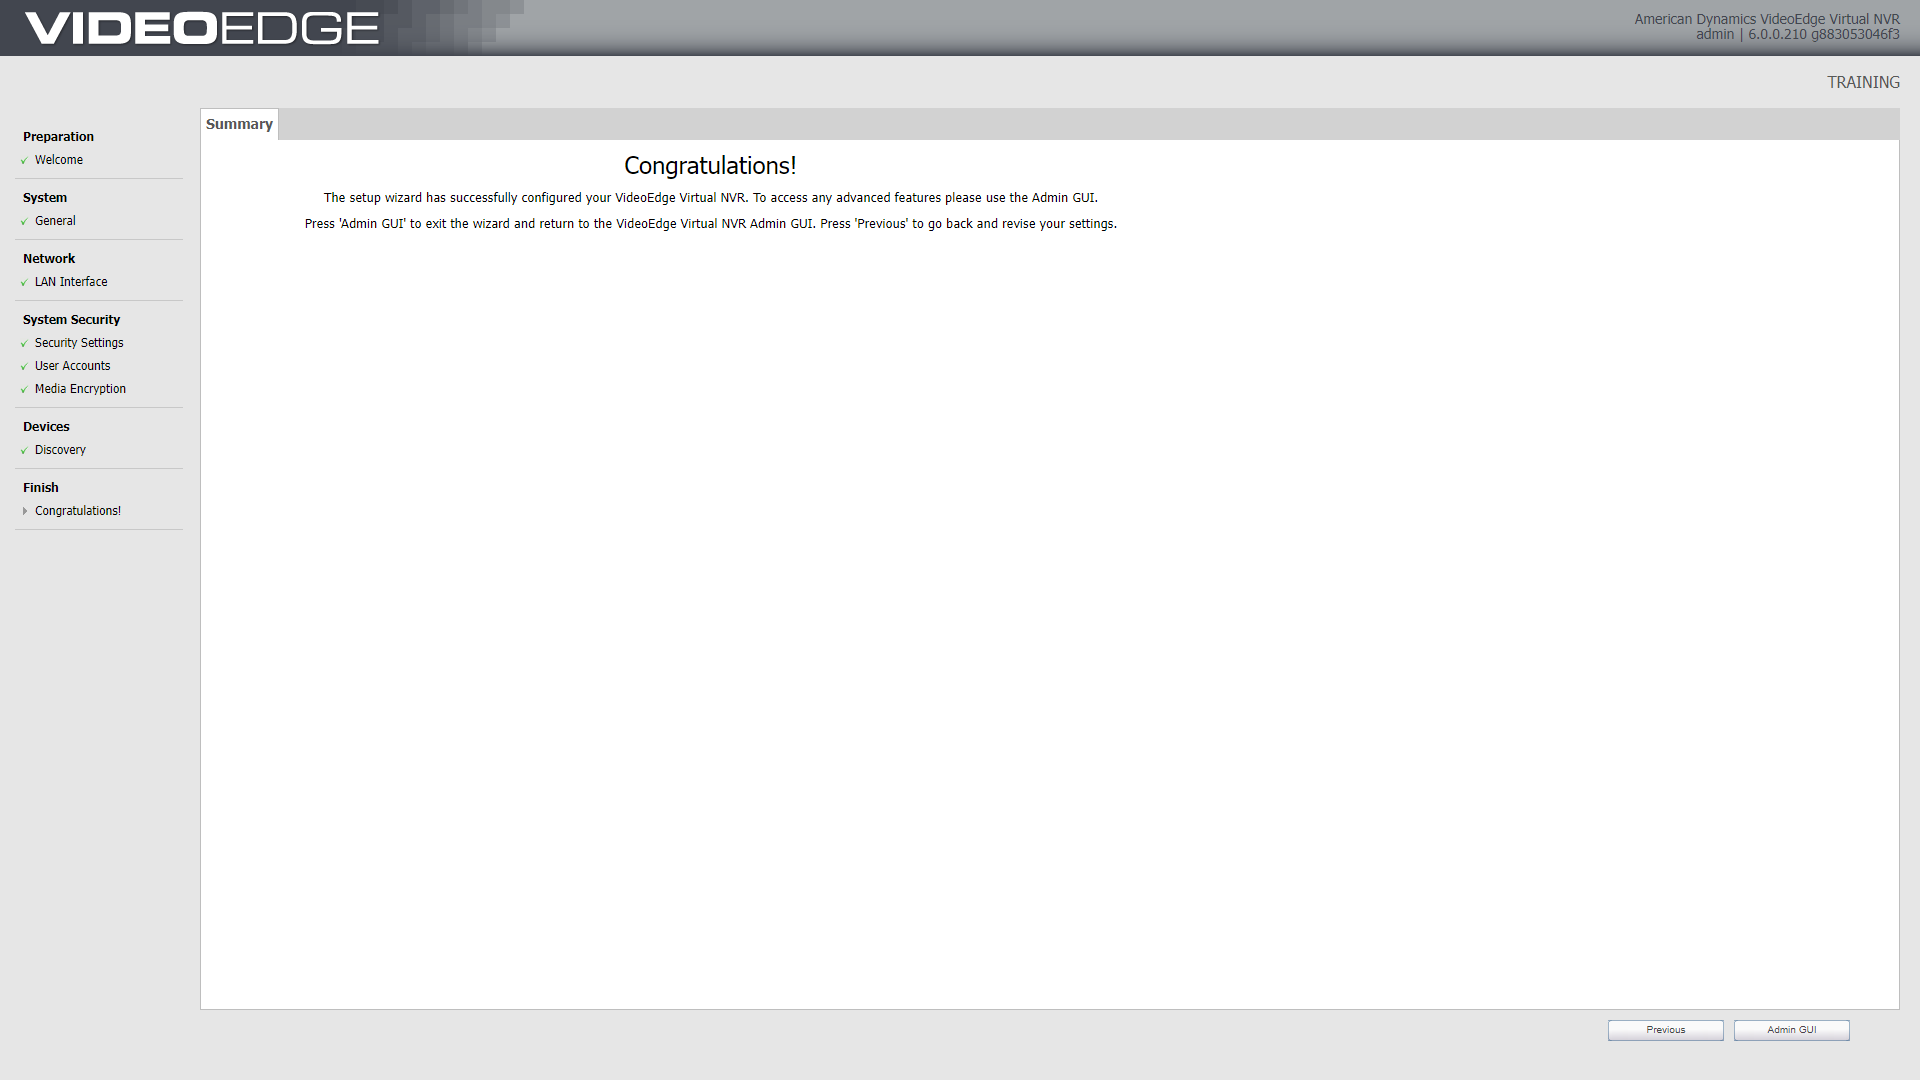
Finish
The Setup Wizard is now complete, and you can exit the wizard to the Administration Interface by clicking NVR Admin Client.
Key Points:
Items that most commonly change-
System Info Page
Host Name, Location, and Date and Time
Networking Page
LAN IP Configuration, NTP Settings (Per client environment)
System Security Page
All Account Passwords per Client specifications
Licensing
All VideoEdge installations must be licensed for full functionality. This module will cover the basic types of licenses and how to apply a Local license to VideoEdge. Further information can be found in VideoEdge 201 - Licensing
License Types
There are 3 available license types for a VideoEdge NVR:
Temporary - This is the 60 day trial license that is supplied with a VideoEdge unit out of the box. The timer begins once you complete the setup wizard.
Local - The local license for a single VideoEdge.
victor Centralized - A centralized license is a victor license that contains both victor and VideoEdge features. Victor Centralized licenses are not stored on the VideoEdge - they are stored on a victor Application Server. To access the centralized license features, you must configure your VideoEdge to connect to the victor Application Server. This enables all camera and analytic licenses for multiple VideoEdge's to be stored in one place.
Activating a Centralized license will be covered in a later module
Licensing VideoEdge (Local License)
Licensing a VideoEdge with a Local License is a 3 step process:
Generate a Host ID
Register for a license online
Apply license to VideoEdge
1. Generate a Host ID
The Host ID is a unique reference for your VideoEdge. Before registering and applying for a VideoEdge license online, you must generate the Host ID for the VideoEdge you are licensing.
Log into the VideoEdge Administration Interface
Navigate to System → Licensing
Press Generate Host ID
This will download the Host ID to the local device
2. Register for a License online
After generating Host ID, the next step is to register your VideoEdge and upload the Host ID file to the American Dynamics website. The online form also requires your Software Serial Number which can be found on your VideoEdge installation media, on a sticker on the VideoEdge or on the About page accessed by selecting the Information icon in the VideoEdge Administration Interface. This number will begin with “NV”.
An account on the American Dynamics website is required before registration.
Navigate to https://www.americandynamics.net/
Select Support → Register Software Licensing
Sign in with your American Dynamics account when prompted
Select VideoEdge Software
For the Brand select American Dymanics, and for the Product select VideoEdge
Consent to the Privacy Notice
Fill out the registration form
Contact your direct manager to obtain what information should be put in each required field
The license will be automatically e-mailed to the account specified in the registration form.
3. Apply License to VideoEdge
When an email has been received containing the license file, it can be applied to the VideoEdge unit.
Download the license from the e-mail
Return to the licensing page under the System menu in the VideoEdge Administration Interface.
Ensure Local License is selected
Under Configure Local Licensing press Choose File
This will open a file explorer
Navigate to the location where you downloaded the license and select the license file
This will likely be the Downloads folder unless you specified another location
Click Apply Local License
Verify that the License type has changed from Temporary to Local
Network Settings
Network settings will heavily depend on the unique setup of each job site, and as such will be provided by the client in most cases. This module will go over the most commonly adjusted settings and where to find them.
Network settings can be adjusted in the VideoEdge Administration Interface, under the Networking menu. The following is a list of the most common settings you will be asked to adjust on a job (all can be found under Networking → General):
Domain Name
Domain Name Servers
Default Gateway
NTP Status
NTP Servers
Note that the previous step must be completed before moving on. If network settings are absent or incorrect, the nexts steps will not work.
- Insert section about creating security groups.
Adding Devices
Once you have completed installing, activating, and configuring VideoEdge, the next step will be to add cameras. There are three methods to accomplish this:
Discovery
Automatically detects cameras and adds them to VideoEdge
Will not work on Cameras that do not have the default password set
Automatically assigns a Camera Number to each device
Can be done during the Setup Wizard
Manual
Able to be completed in the VideoEdge Administration Interface
Able to specify the Device Name, Address, Manufacturer, Storage Set, and Security Group
Most common method
CSV
Upload multiple cameras via a pre-created spreadsheet
Useful for adding multiple cameras at one time
This lesson will cover adding Cameras manually, as that is the most common method you will encounter in the field.
To do so:
Log into the VideoEdge Administration Interface
Navigate to Devices → List
Under the Video List tab, press the + icon
This will open the Add Device menu
Fill out the required fields per the job specifications
Press the Save icon
The Camera should now be added into the Video List
Review
Installation and Configuration Process:
Four stages to install VideoEdge:
Booting the system to the installation media
Rebooting the system when prompted
Logging in to the VideoEdge desktop
Configuring VideoEdge using the Setup Wizard.
The Setup Wizard includes several menu items: Preparation, System, Network, System Security, Devices, and Finish.
Licensing:
All VideoEdge installations must be licensed.
There are three types of VideoEdge licenses: Temporary, Local, and Victor Centralized.
Licensing VideoEdge with a local license involves a three-step process:
generating a Host ID
registering for a license online
applying the license to VideoEdge
Network Settings:
Network settings can be adjusted in the VideoEdge Administration Interface, under the Networking menu.
The most common settings to adjust on a job include Domain Name, Domain Name Servers, Default Gateway, NTP Status, and NTP Servers.
Adding Devices:
There are three methods to add cameras to VideoEdge: Discovery, Manual, and CSV.
The most common method is adding cameras manually
This can be preformed under Devices → List
Quiz
What are the four main stages of setting up and installing VideoEdge?
a) Booting the system, selecting installation options, logging in, configuring VideoEdge
b) Booting the system, agreeing to the license agreement, selecting installation options, logging in
c) Booting the system, rebooting after installation, logging in, configuring VideoEdge
d) Booting the system, selecting installation options, rebooting after installation, logging inWhat should you do if VideoEdge does not boot from the USB drive?
a) Restart the system and try again
b) Look for a boot options key on the startup screen and press it before the OS starts to load
c) Call customer support for assistance
d) Insert a different USB driveWhat is the default username for logging in to the VideoEdge desktop?
a) Admin
b) User
c) VideoEdge
d) PasswordWhat is the default username and password for logging in to the VideoEdge Administration Interface?
a) Username: admin, Password: admin
b) Username: VideoEdge, Password: VideoEdge
c) Username: admin, Password: VideoEdge
d) Username: VideoEdge, Password: adminWhen does the setup wizard launch in VideoEdge?
a) After the basic installation is complete
b) Before the basic installation begins
c) During the reboot after installation
d) When the system boots to the VideoEdge login screenWhat is the first page of the VideoEdge Setup Wizard?
a) System Info
b) LAN Interface
c) Security Settings
d) WelcomeWhat can users do on the System Info page of the Setup Wizard?
a) Set the LAN interface settings
b) Edit the security settings
c) Set the VideoEdge hostname and location
d) Discover devices on the networkWhat does the Security Settings page of the Setup Wizard allow users to set?
a) The preferred security mode for the unit
b) The IP address allocation for the LAN interface
c) The username and password for the root account
d) The encryption option for VideoEdge mediaWhat is the default password for the VideoEdge desktop account?
a) admin
b) operator
c) root
d) VideoEdgeWhat can users do on the Discovery page of the Setup Wizard?
a) Configure cameras before adding them to the network
b) View the Support ID for their VideoEdge NVR
c) Set the current date and time
d) Discover devices on their network that can be added to VideoEdge.What are the three available license types for a VideoEdge NVR?
a) Basic, Advanced, Premium
b) Temporary, Local, Remote
c) Trial, Permanent, Centralized
d) Standard, Pro, EnterpriseWhat is the Host ID?
a) The unique reference for the VideoEdge NVR being licensed
b) The license file sent after registering for a license
c) The username and password used to log in to the VideoEdge Administration Interface
d) The IP address of the VideoEdge NVRWhere can the Host ID be generated in the VideoEdge Administration Interface?
a) System → Licensing
b) Network → LAN Interface
c) System Security - Security Settings
d) Devices → DiscoveryWhat is required to register for a VideoEdge license online?
a) The Host ID and Software Serial Number
b) The Host ID and IP address of the VideoEdge NVR
c) The username and password for the American Dynamics website
d) The License Type and License KeyHow is a license file applied to a VideoEdge NVR?
a) It is emailed to the VideoEdge NVR and automatically applied
b) It is uploaded through the Devices menu in the VideoEdge Administration Interface
c) It is downloaded from the American Dynamics website and then uploaded through the System menu in the VideoEdge Administration Interface
d) It is entered manually into the Licensing page in the VideoEdge Administration InterfaceWhere can network settings be adjusted in the VideoEdge Administration Interface?
a) System menu
b) Licensing menu
c) Devices menu
d) Networking menuWhere can the Domain Name and Domain Name Servers be found in the VideoEdge Administration Interface?
a) Devices → Discovery
b) System Security - Security Settings
c) Networking → General
d) System → LicensingWhat is the purpose of the NTP Status setting in the Networking menu?
a) To specify the IP address of the NTP server
b) To enable or disable automatic time synchronization
c) To specify the default gateway for the VideoEdge NVR
d) To configure the network interface card settingsWhat is the purpose of the Default Gateway setting in the Networking menu?
a) To specify the IP address of the NTP server
b) To enable or disable automatic time synchronization
c) To specify the domain name for the VideoEdge NVR
d) To specify the IP address of the router for the VideoEdge NVR.What are the three methods to add cameras in VideoEdge?
a) Discovery, CSV, and XML
b) Discovery, Manually, and Wirelessly
c) Manually, Wirelessly, and CSV
d) Manually, Discovery, and AutomaticWhich tab under Devices should you navigate to in order to add a camera manually?
a) Network List
b) User List
c) Video List
d) Device ListWhat is the purpose of the Add Device menu?
a) To automatically detect cameras and add them to VideoEdge
b) To manually add a camera to VideoEdge
c) To upload a pre-created spreadsheet with multiple cameras
d) To specify the default settings for a new cameraWhat are the required fields to fill out when adding a camera manually?
a) Camera Name, Camera IP Address, and Manufacturer
b) Device Name, Address, Manufacturer, Storage Set, and Security Group
c) Camera Name, Camera Number, and Camera Type
d) Device Name, IP Address, and Default Gateway